Status Badges
Want to show your website's uptime and performance directly on your pages? Pulsetic's Status Badges allow you to easily display a real-time summary of your website's operational status, keeping your customers informed without them needing to visit a separate status page.
Pulsetic offers a user-friendly, no-code way to customize these badges to match your website's design. However, for those who like more control, you also have the option to add your own custom CSS.
How to Create a Status Badge
Step 1: Navigate to Status Badges
- Select Status Badges on the left menu sidebar within your Pulsetic dashboard.
- Select the Create Badge button, located in the upper right corner of the Status Badges page.
- From the Website dropdown, choose the monitor you added to your Monitor's List.
- In the Badge Pages section, customize the appearance of your status badge. Available options include:
- Style: Choose from different pre-designed layouts for your status badge (e.g., horizontal, vertical, compact).
- Roundness: Adjust the corner roundness of the badge to match your website's aesthetic.
- Font-Style: Select the font style for the text displayed on the badge.
- Text Color: Choose the color of the text that shows the status (e.g., "Up," "Down," "Investigating").
- Symbol Color: Set the color of any symbols or icons used in the badge to indicate status.
- Frame Background Color: Customize the background color of the badge frame.
- Custom Text: You might have the option to add custom text to the badge alongside the status information.
- Custom CSS: For advanced users, this allows you to enter your own CSS code to further personalize the badge's appearance beyond the built-in options.
- Badge URL: This is the URL that the badge will link to when clicked. You can typically link it to your full Pulsetic status page for more detailed information.
- Tap the Save Badge button after making any changes to your badge's design.
Note:
Options may vary depending on the selected style.
Step 2: Embed the Badge on Your Website
-
Search for the Code section and copy the generated code for the website URL you selected from the Badge Pages page.
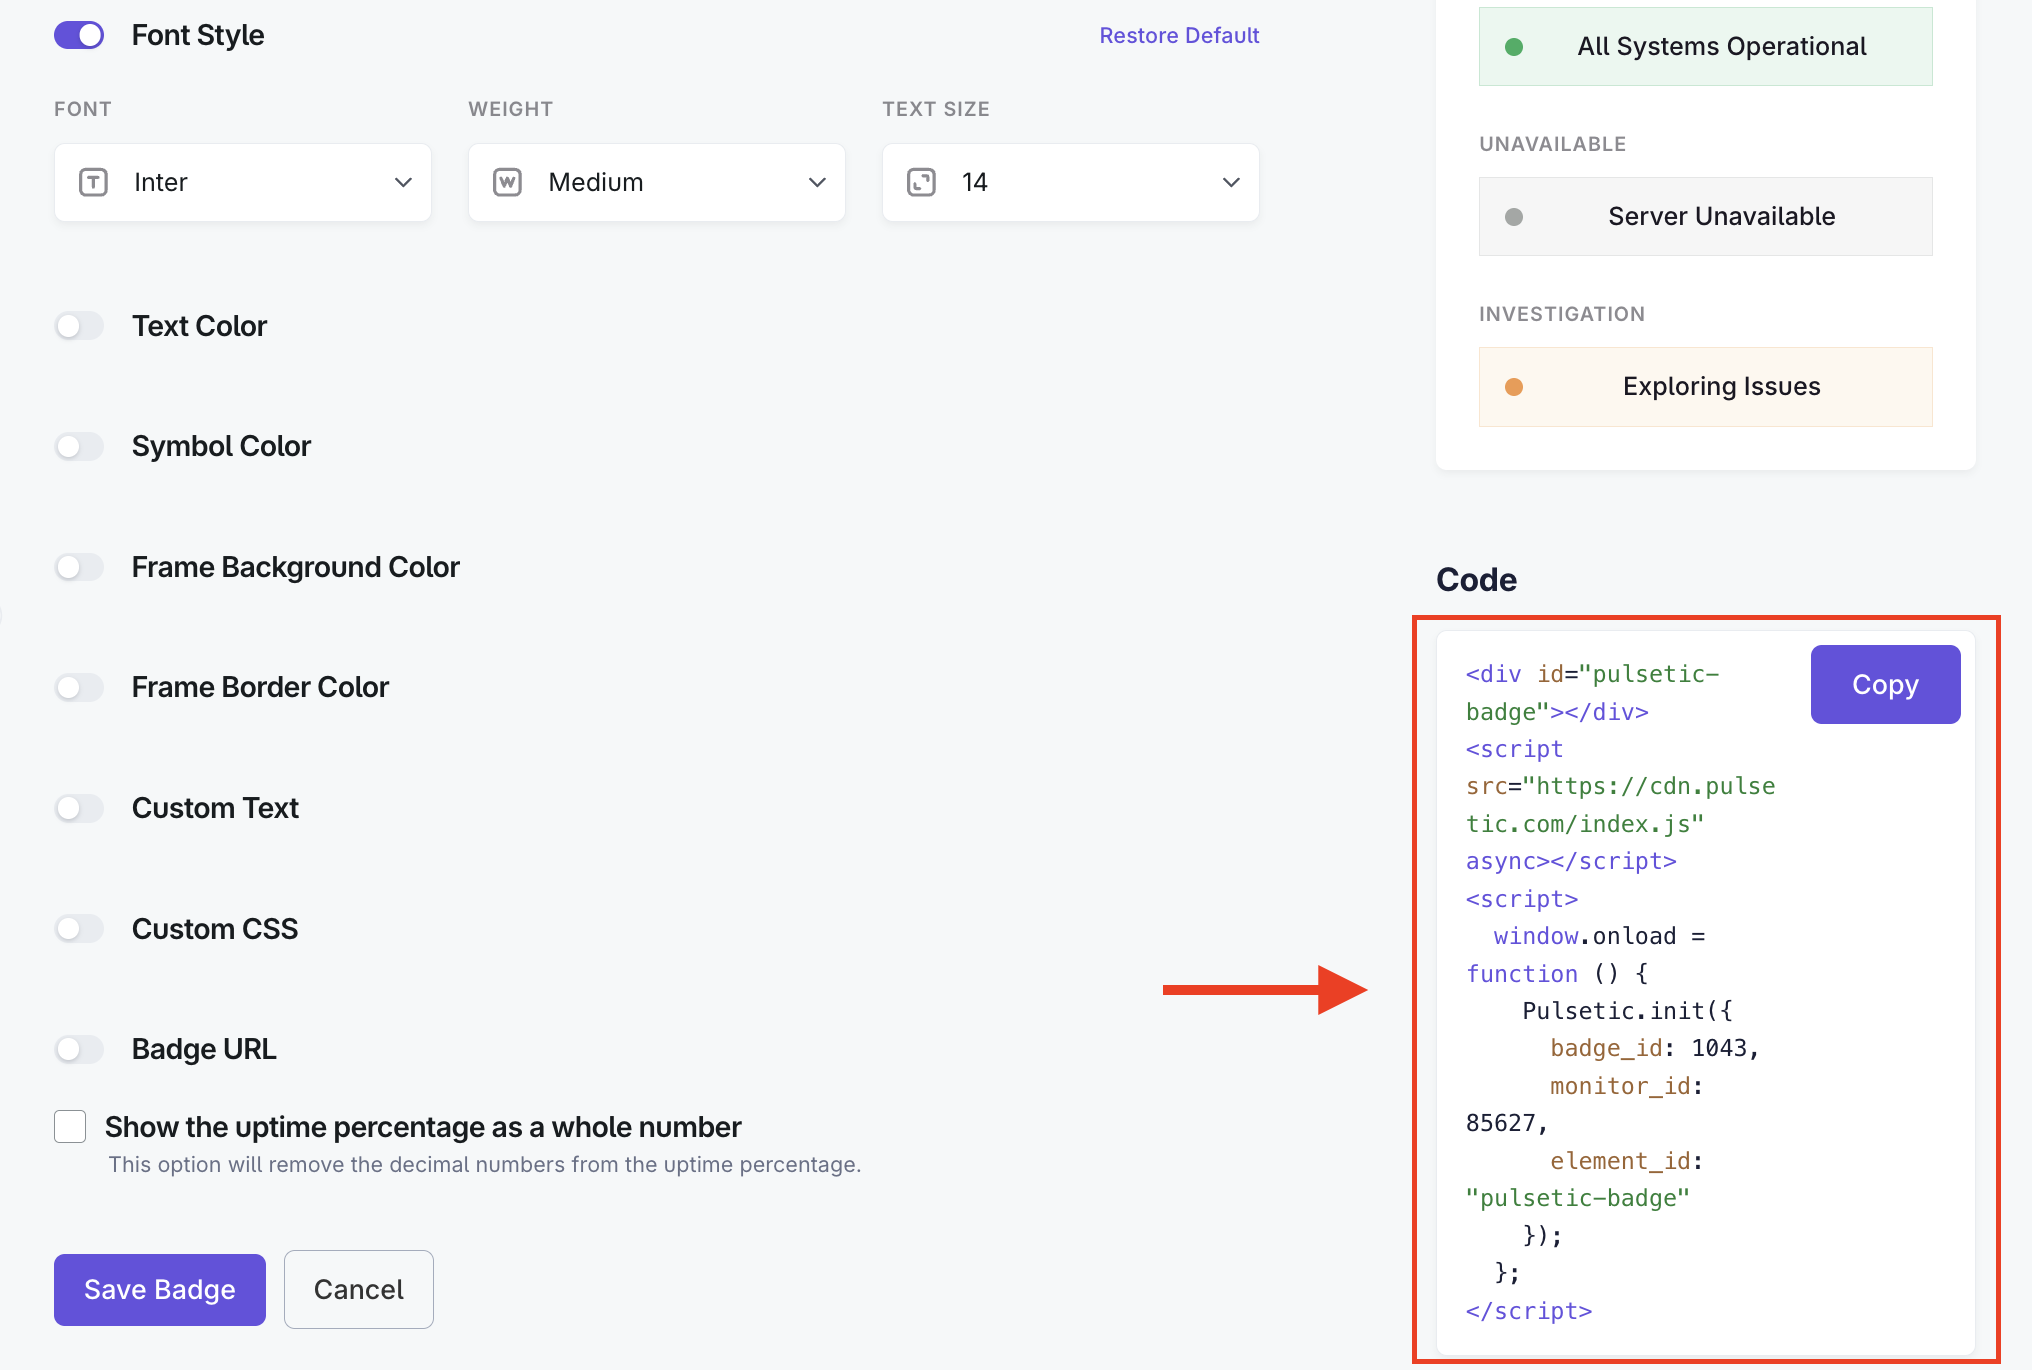
- Paste the copied code into the desired location within your website's HTML. The exact placement will depend on your website's structure and platform.
-
After you’ve added the code to your website, you should see the status badge in the section where you added the code, as shown in the image below. The badge will dynamically update in real time to reflect the current uptime and operational status of the website URL you linked it to.

Sample Badge


The uptime percentage displayed on the Status Badges is an average calculated over the latest 90 days. Currently, it is not possible to configure this to a different timeframe.
Edit, Duplicate, and Delete Status Badges
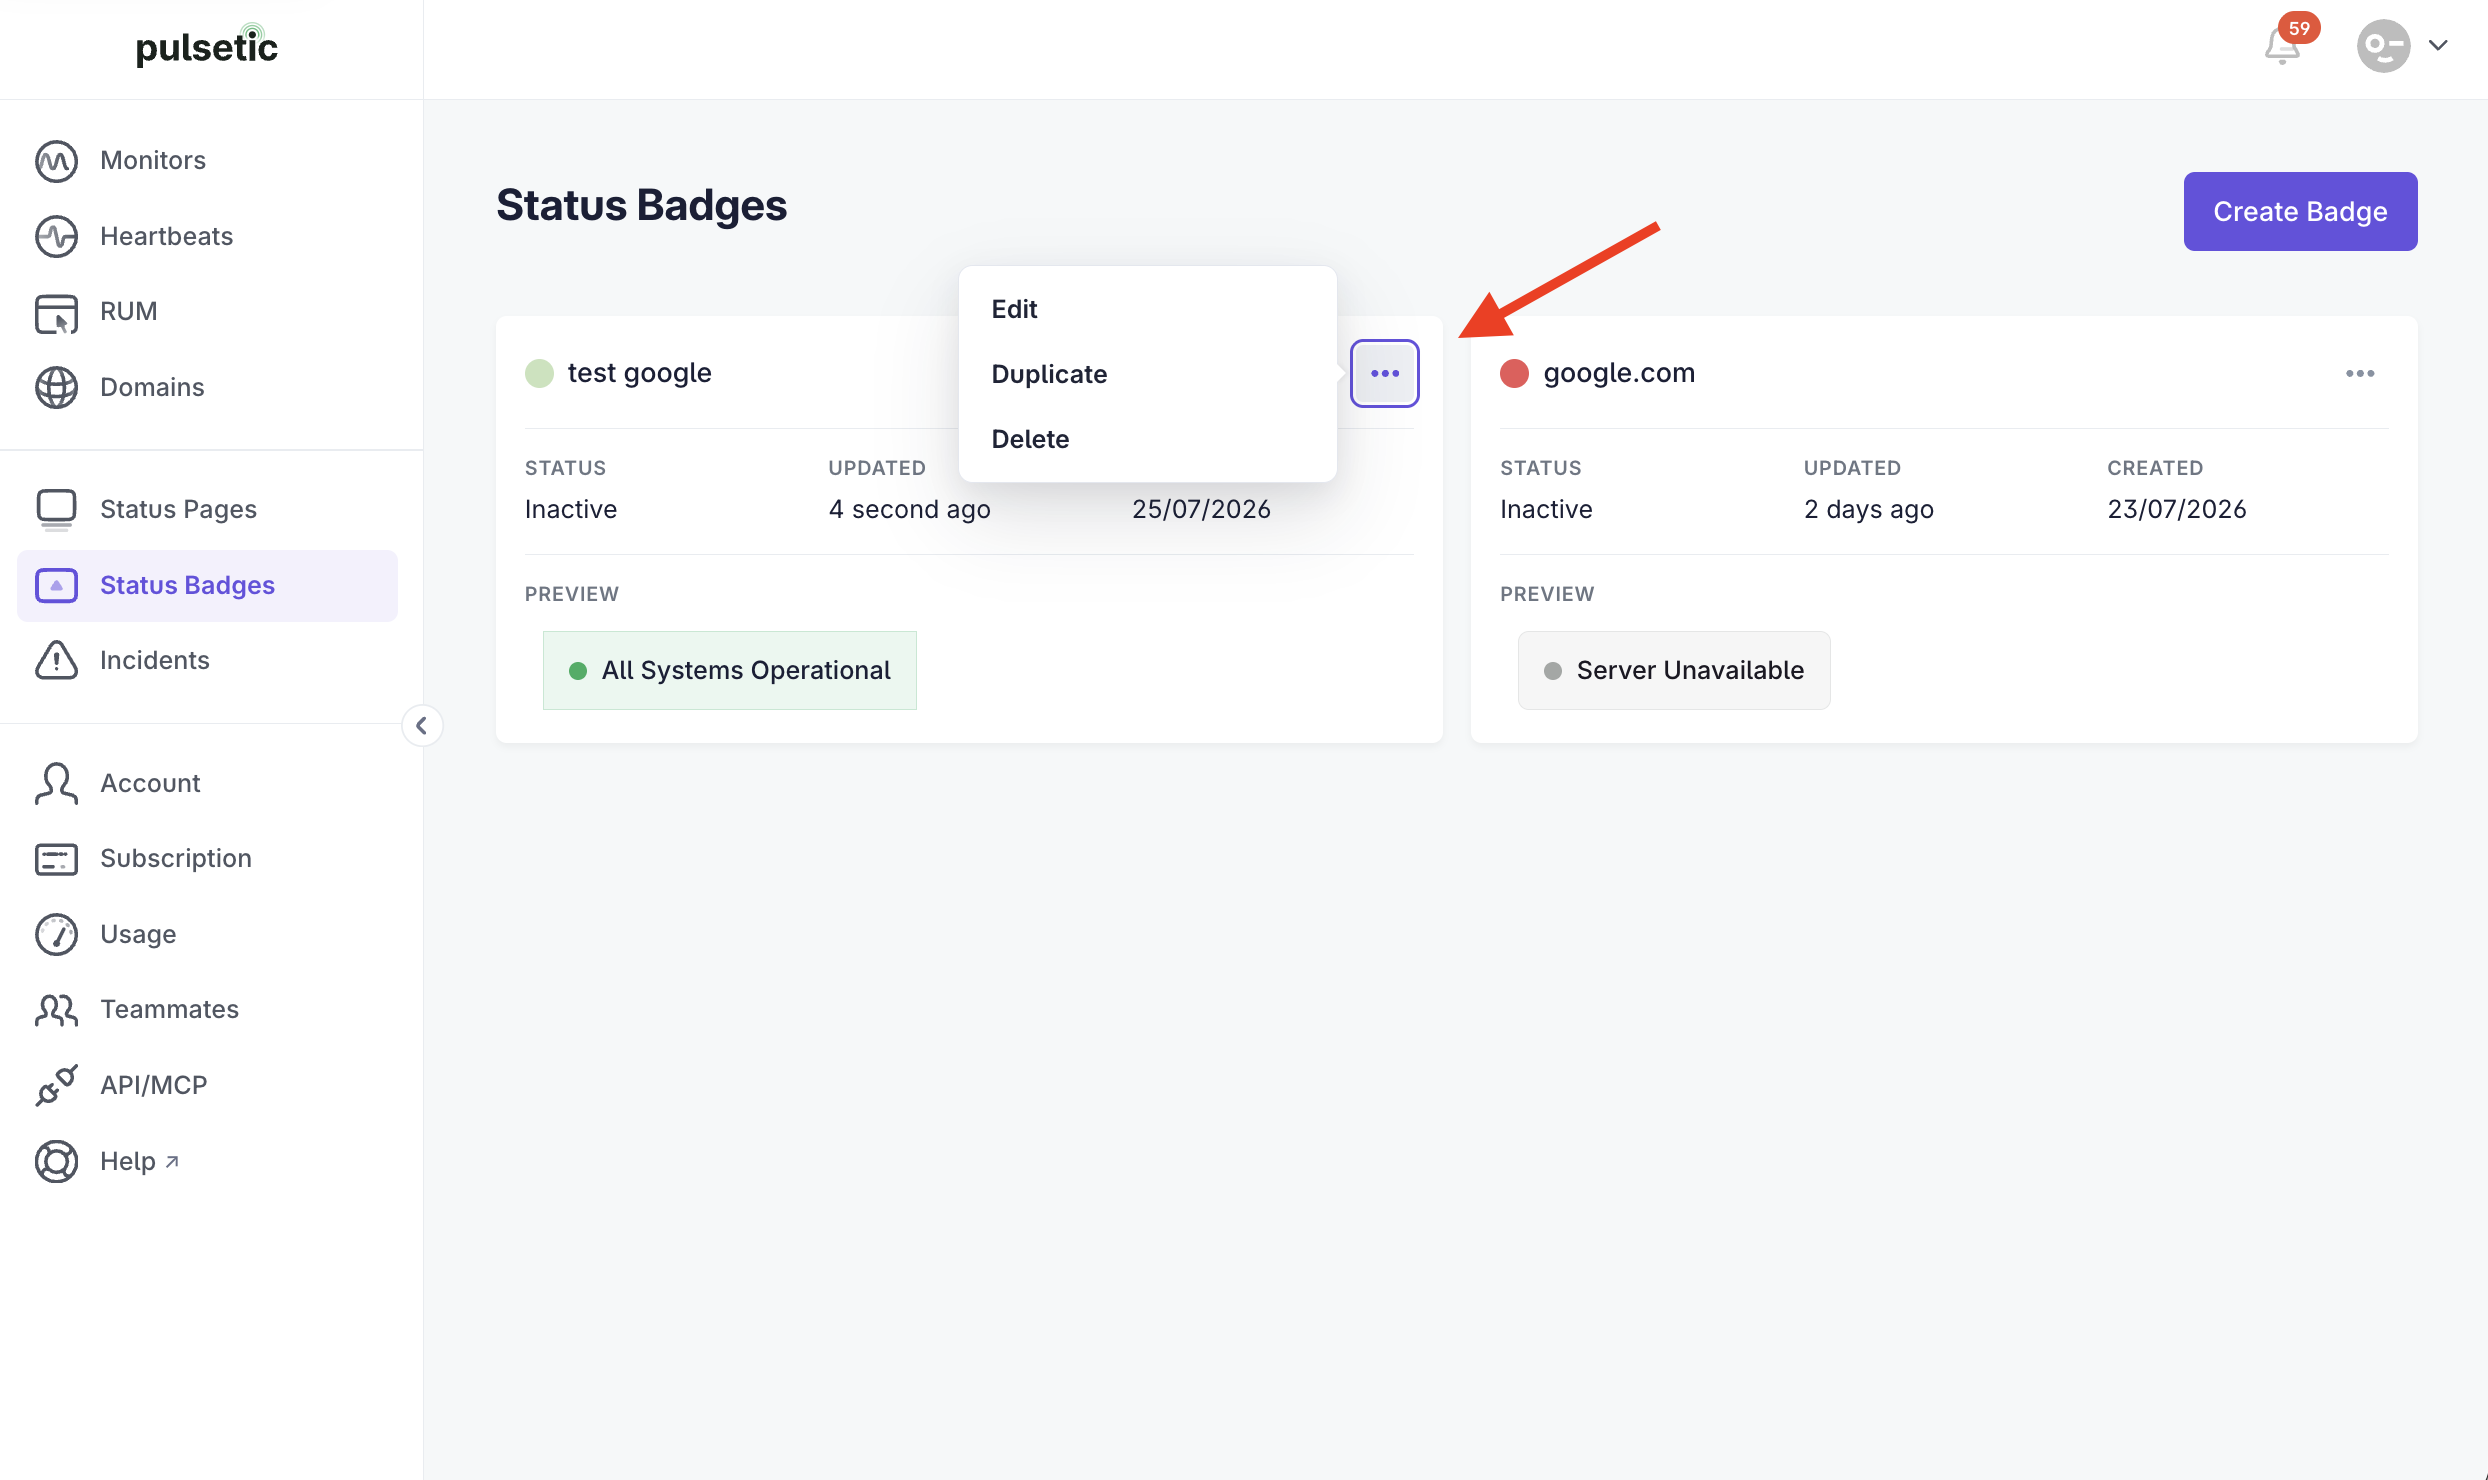
You can edit your status badges if you need to adjust settings after their creation. Additionally, you can duplicate the status badges if you want to preserve the same settings. Moreover, you can remove the status badges if you don't need them. All of this can be done by clicking the three dots menu on the desired status badge.