Update Profile Details
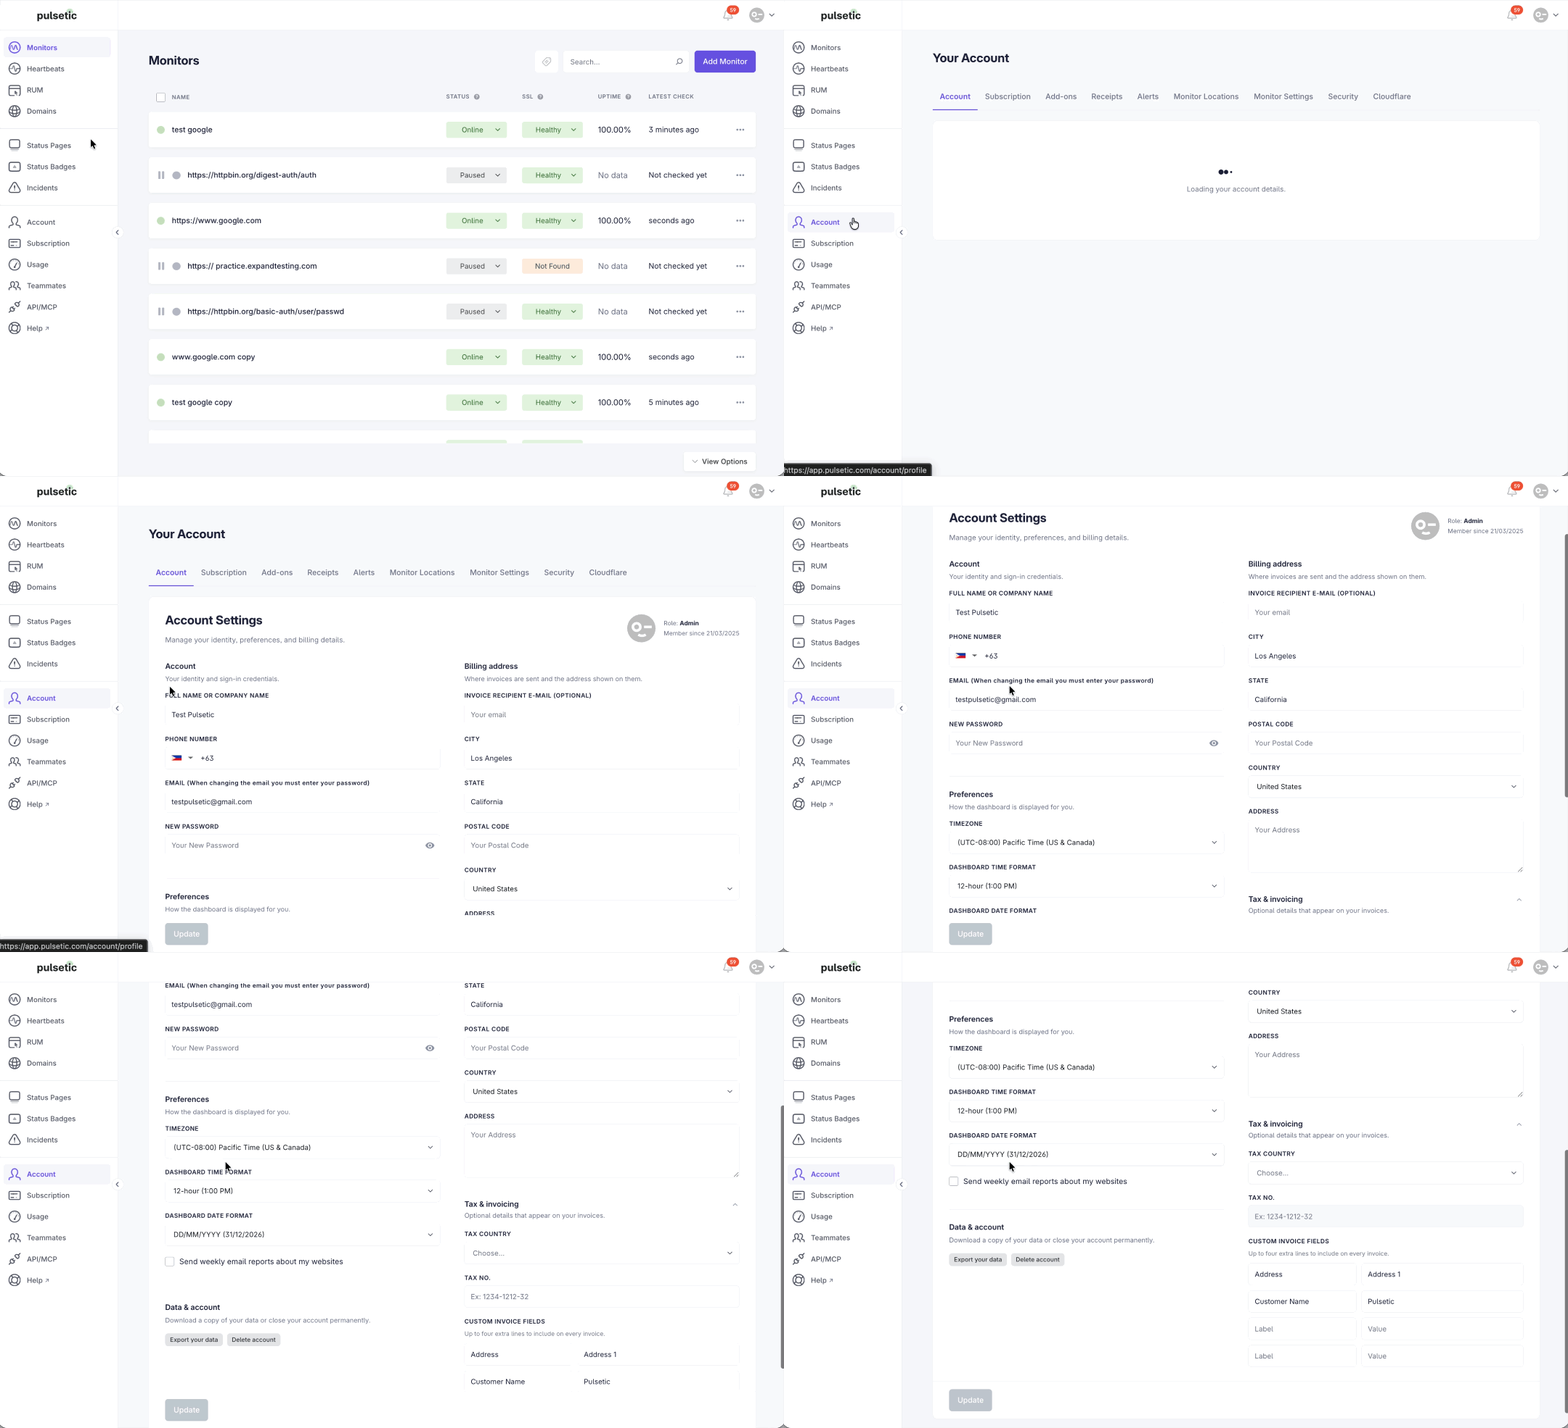
Keeping your Pulsetic profile up-to-date ensures accurate account information and allows you to customize your experience. The Account Settings page provides a centralized location to manage your identity, dashboard preferences, and billing details.
Why use this? Updating these settings ensures your invoices are sent to the right place, your dashboard displays time in your local format, and your login credentials remain secure.
Steps to Update Your Profile
- Log in to your Pulsetic dashboard. Click on Account in the left-hand navigation menu to open your settings.
- Click on Account in the left-hand navigation menu to open your settings.
- Ensure the Account tab is selected.
- Navigate through the sections and modify the fields or checkboxes as needed:
-
Account
- Manage your identity and sign-in credentials.
- Full Name or company name: Enter your complete name or organization name as you want it to appear on your Pulsetic profile.
- Phone Number: Enter your primary contact phone number.
- EMAIL: Update your login email address. (Note: When changing your email, you must enter your current password to authorize the update.)
- New Password: Enter a new password if you wish to change your login credentials.
- Manage your identity and sign-in credentials.
-
Preferences
- Customize how the dashboard is displayed for you.
- Timezone: Select your local timezone from the dropdown menu (e.g., (UTC-08:00) Pacific Time (US & Canada)).
- Dashboard Time Format: Choose your preferred time display option (e.g., 12-hour (1:00 PM)).
- Dashboard Date Format: Select how dates appear across your reports and logs (e.g., DD/MM/YYYY).
- Send weekly email reports about my websites: Ticking this box sends a regular summary of your monitoring performance. If you want to turn these off later, review How to Unsubscribe from Weekly Reports.
-
Data & Account
- Download a copy of your data or close your account permanently.
- Export your data: Click this button to save a local copy of your monitoring configurations and historical logs. For a detailed guide, see Export Your Data.
- Delete account: Click this button to begin the permanent account removal process. For instructions, see Delete Your Account.
- Download a copy of your data or close your account permanently.
-
Billing Address
- Set where invoices are sent and the address shown on them.
- Invoice recipient e-mail (optional): Enter an alternate email address (such as accounting or finance) if you want payment notifications sent separately from your main account email. To learn more, see How to Receive Invoices by Email.
- City, State, Postal code, Country, Address: Enter your company's official registered location details to appear on billing records.
- Set where invoices are sent and the address shown on them.
-
Tax & Invoicing
- Optional details that appear on your official invoices.
- Tax Country: Select the primary country where your business pays taxes.
- Tax No.: Enter your business Tax ID or VAT identification number.
- Custom invoice fields: Enter up to four extra lines of text (e.g., Purchase Order numbers or department IDs) to include on every invoice.
- Optional details that appear on your official invoices.
- After making your modifications, hit the Update button to save your changes.