
How to Receive Invoices by Email
To have your invoices automatically sent directly to you or your finance team, you can update your configuration in the dashboard. Setting this up ensures that your accounting department or billing administrators get the records they need immediately, without you having to manually forward receipts every month.
Step-by-Step Tutorial
- Log in to your Pulsetic dashboard and navigate to Account Settings.
- Scroll down the page until you find the Billing address section.
-
Find the Invoice recipient e-mail (optional) field. Type in the specific email address where you want future invoices delivered (e.g.,
accounting@yourcompany.com).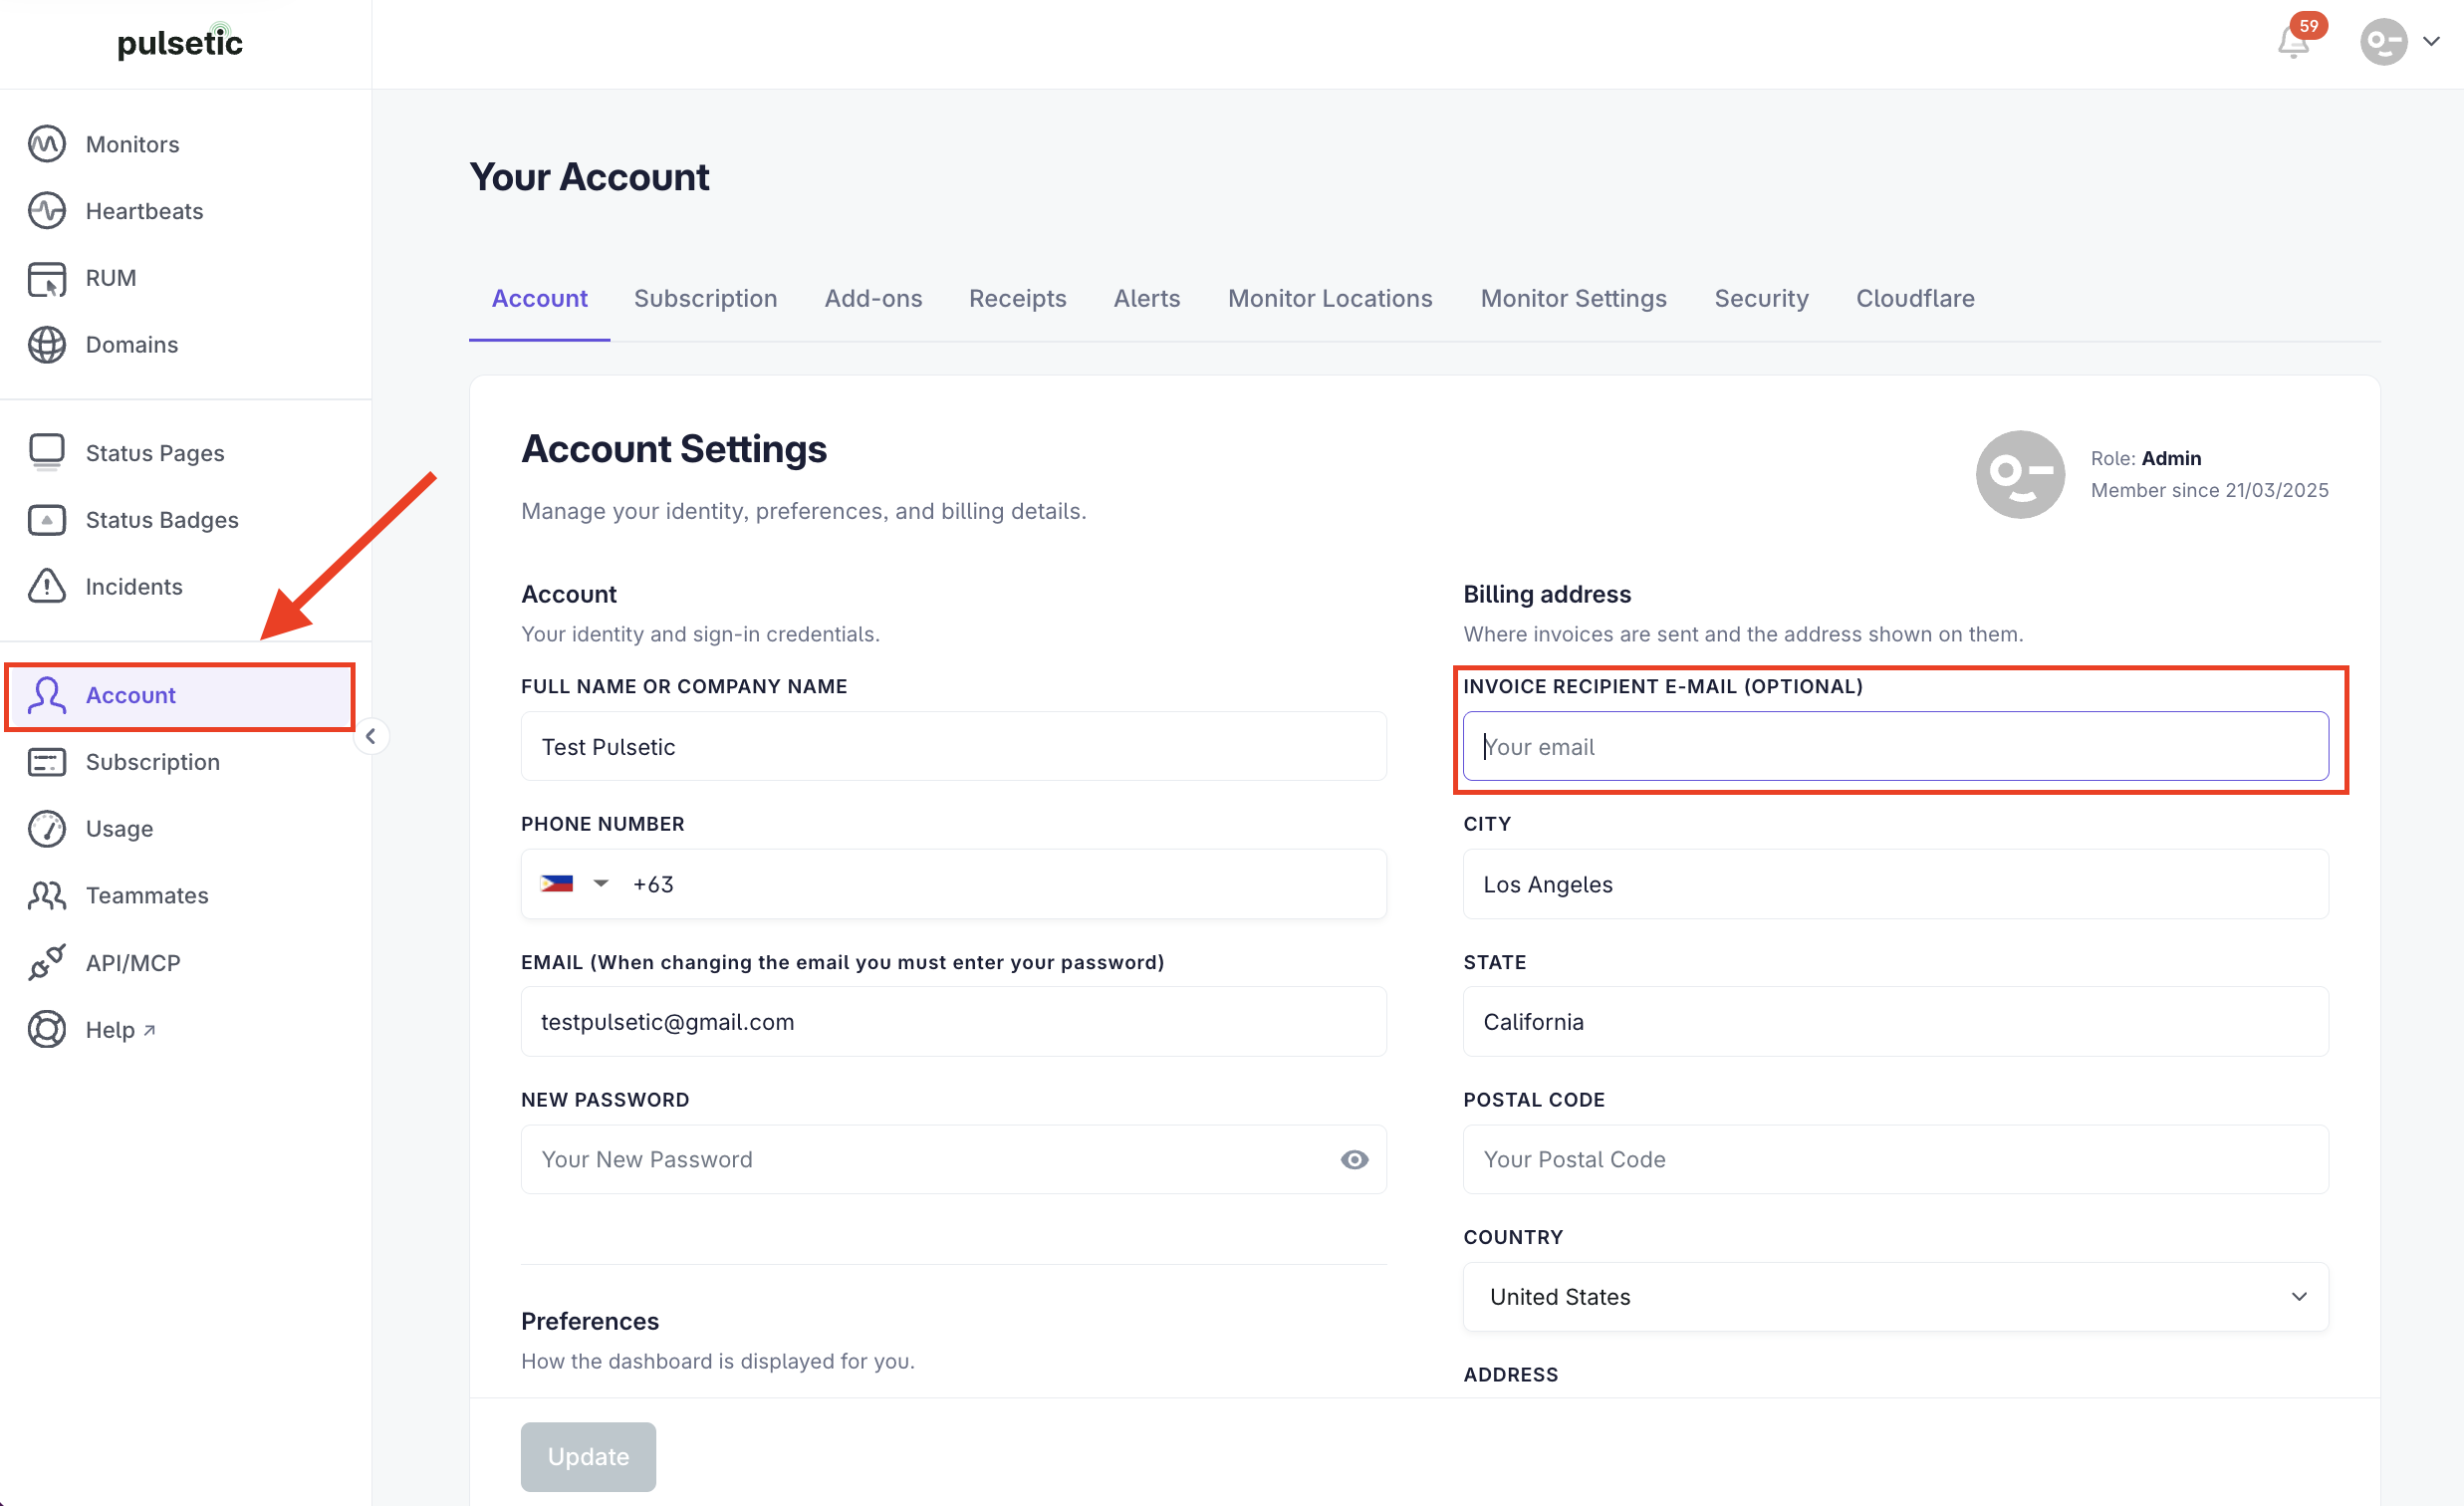
- To ensure your invoices have all the necessary information for your finance team, you can also fill out the remaining fields in this section, including:
- City
- State
- Postal code
- Country
- Address
- If your organization requires specific business details on its receipts, scroll down to the Tax & invoicing section. Here you can add your Tax Country, Tax No. (e.g., VAT, EIN, or GST number), and up to four Custom invoice fields (like internal PO numbers or specific department labels) to include on every invoice.

Note:
Once your settings are saved, all future invoices will automatically be routed to the recipient email inbox you specified.