Pulsetic MCP Server
What is Pulsetic MCP
The Pulsetic MCP (Model Context Protocol) server lets AI agents securely access your Pulsetic monitoring platform and enrich their answers with real-time uptime data. MCP is an open standard that allows AI tools to connect with third-party APIs in a secure, consistent way. In our case, it connects AI assistants with Pulsetic, enabling you to ask your AI to check monitor statuses, create incidents, schedule maintenance, and more - all through natural conversation.
Most popular AI tools support connecting to the remote MCP directly. Here are the step-by-step setup guides for supported clients:
- Claude Desktop
- Claude Code
- ChatGPT
- Cursor
- Windsurf
- Any client implementing the MCP specification
Prerequisites
Before setting up the connection, ensure you have the following ready:
- API Access: A Pulsetic account on a plan with API access (Business or Enterprise).
- Pulsetic API Key: You must have an active API key to authenticate the server. You can generate and manage your keys directly in your dashboard by navigating to Settings → API, or by securely accessing your account API settings here: https://app.pulsetic.com/account/api.
- Compatible AI Client: An MCP-compatible AI application installed and ready to configure (see the list above).
Connect to Pulsetic MCP
Pulsetic provides a hosted MCP server. Use the following URL when prompted by your specific client configuration:
Connection URL
- Streamable HTTP:
https://api.pulsetic.com/mcp
Claude Desktop (Anthropic's desktop app)
Claude Desktop uses stdio-based MCP servers. Use mcp-remote to bridge the remote HTTP endpoint.
Installation
-
Click on your profile icon in the lower-left corner of the Claude app and choose Settings from the menu.
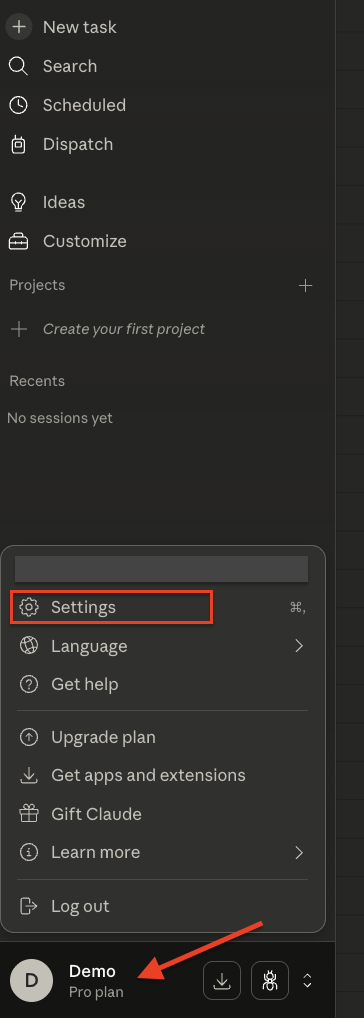
Profile Settings -
In the Settings, select Developer under Desktop app and click Edit config.
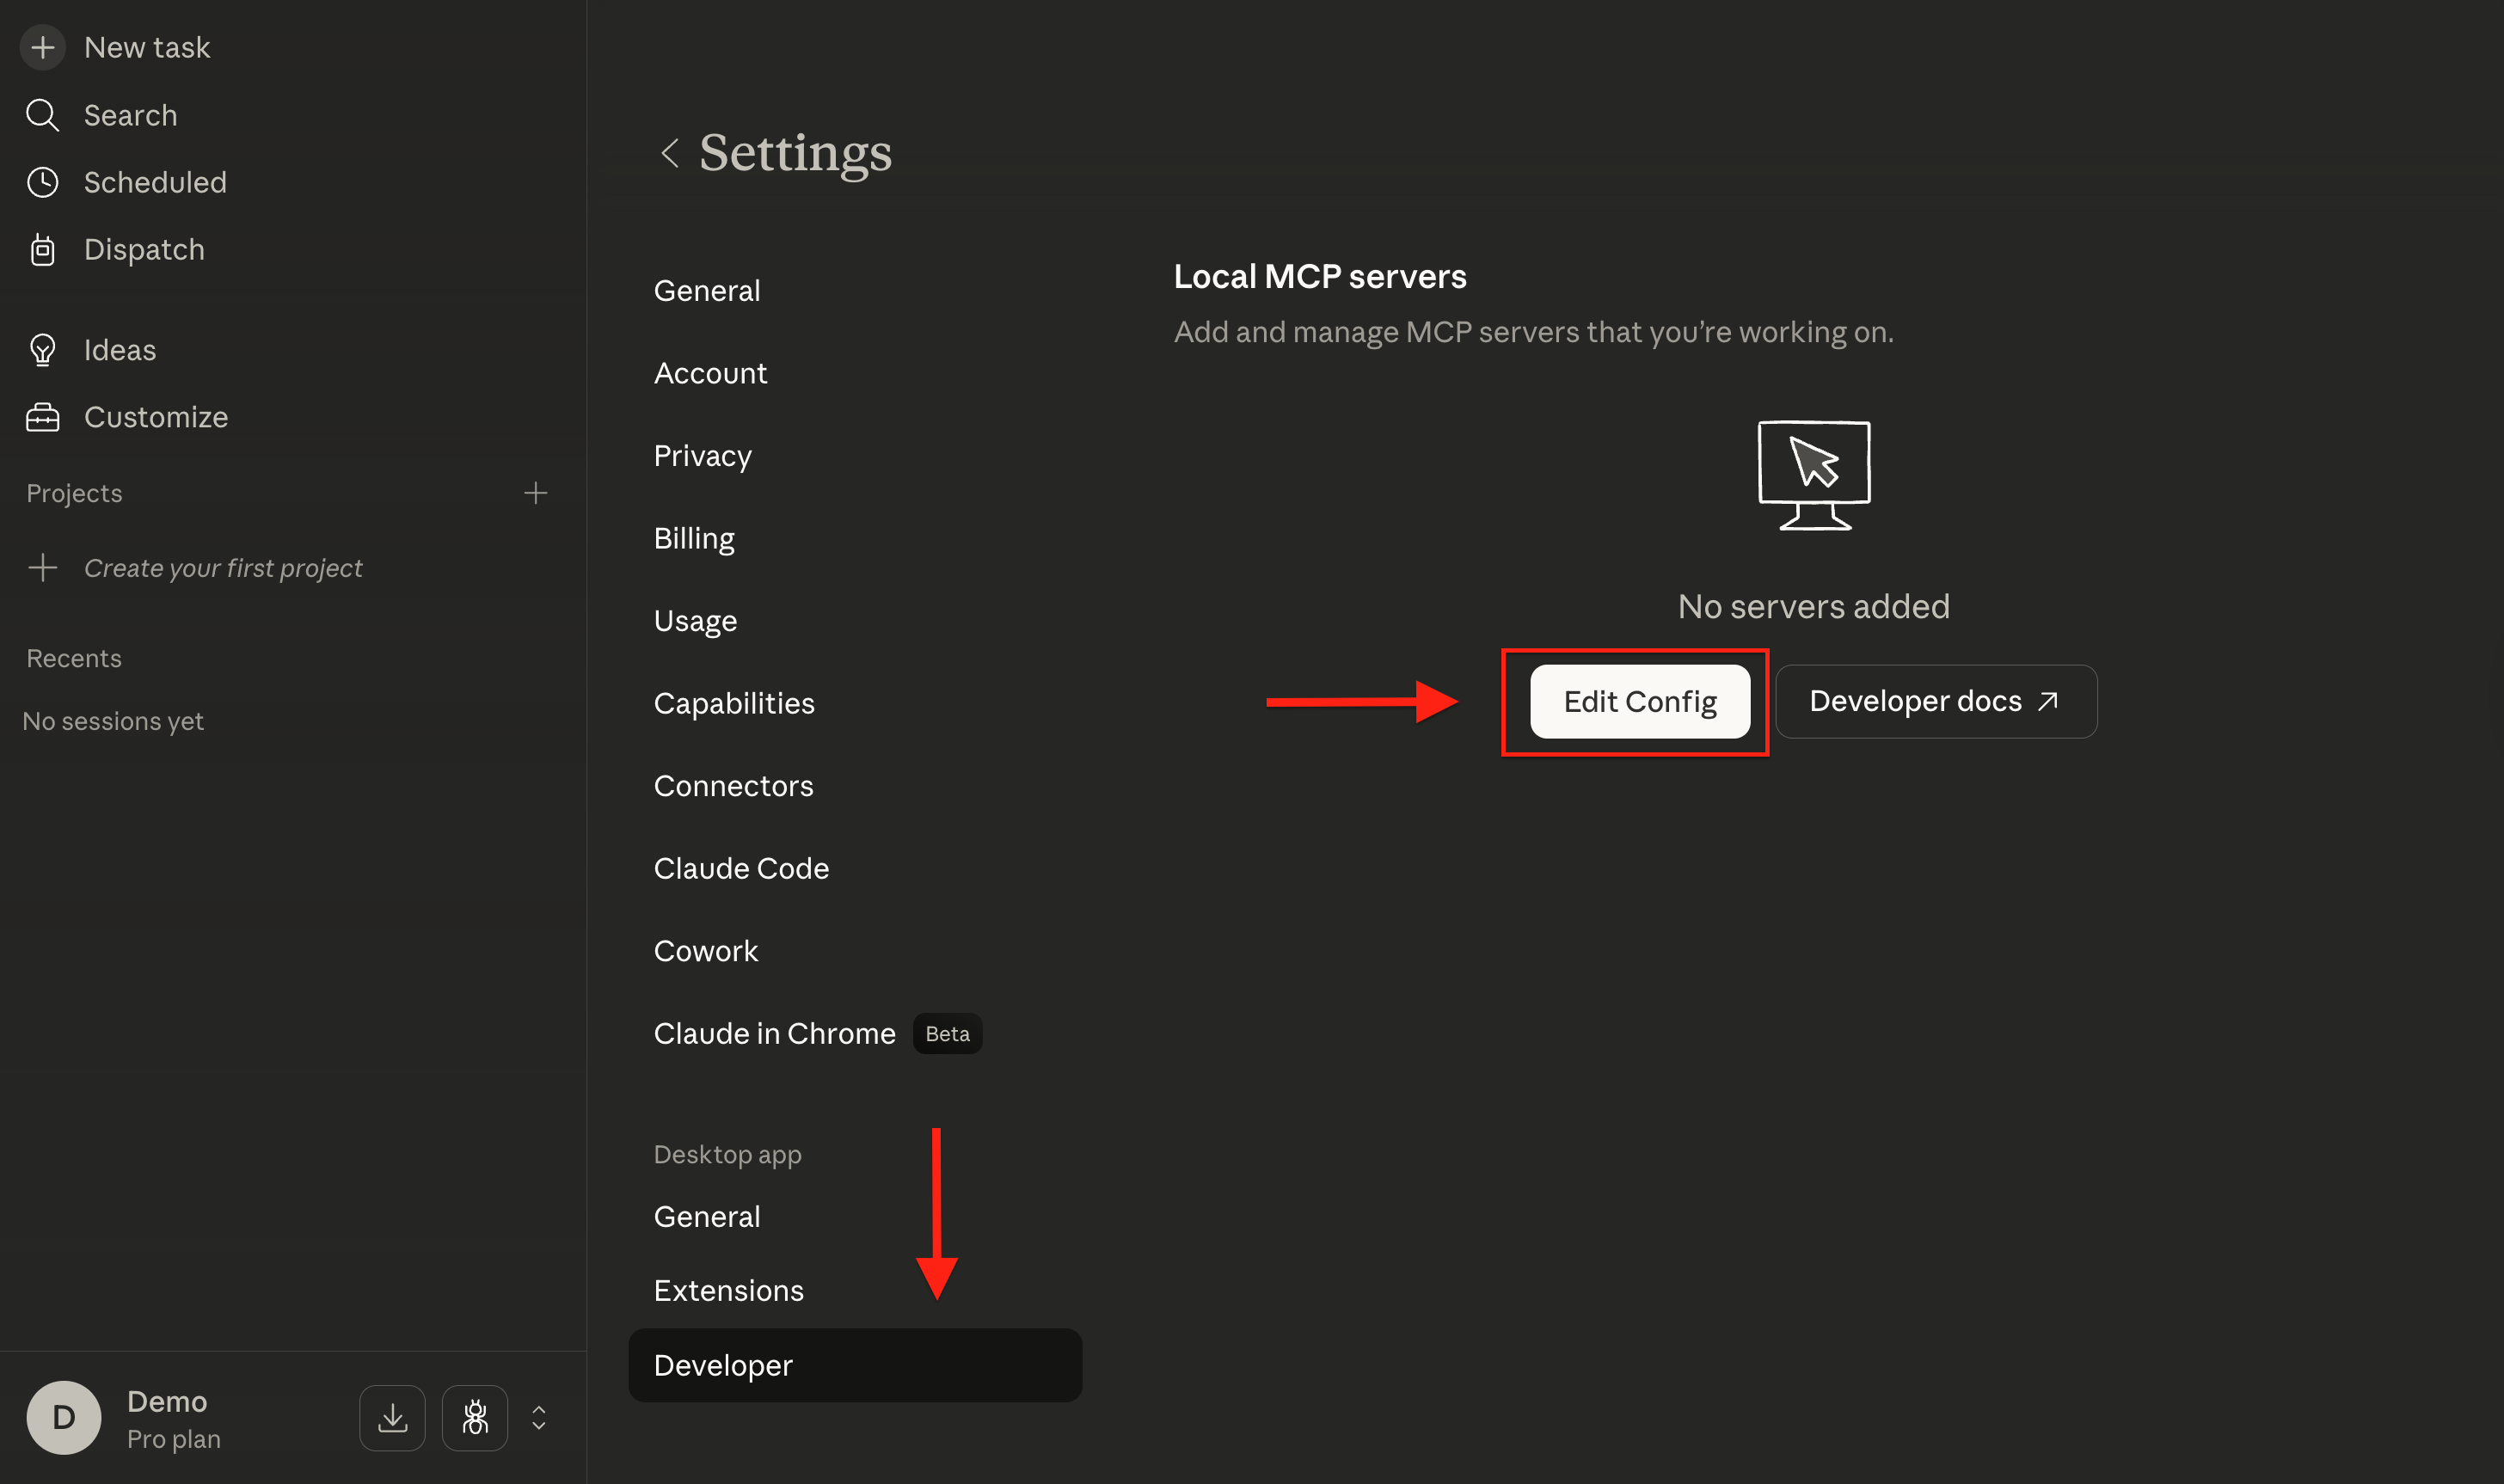
Edit Config -
This will open or locate the
claude_desktop_config.jsonfile.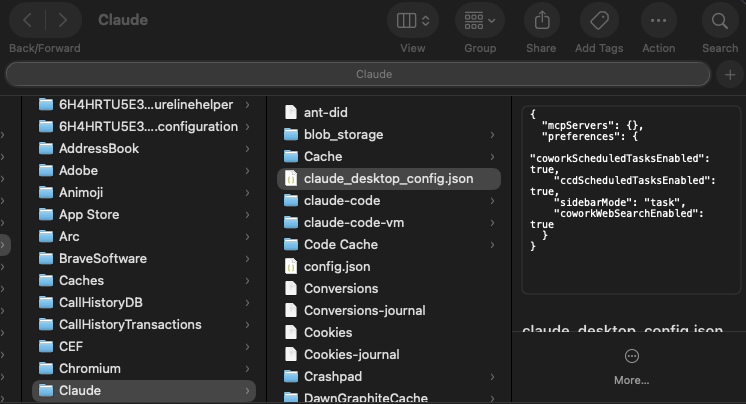
Config File Location - Update your configuration in the following format:


{
  "mcpServers": {
    "pulsetic": {
      "command": "npx",
      "args": [
        "-y", "mcp-remote",
        "https://api.pulsetic.com/mcp",
        "--header", "Authorization: Bearer YOUR_API_KEY"
      ]
    }
  }
}
Note
Replace YOUR_API_KEY with your actual API key. Then restart Claude Desktop to apply.
- After you restart Claude, go back to the Developer page and confirm if you have successfully added the Pulsetic MCP server. You will see there that the
pulseticMCP server is running.

Using Pulsetic with Claude
- Enable the connector in the chat settings dropdown.
- Add a prompt, for example:
"Using Pulsetic, list down all the monitors in my system, then create a dashboard based on the traffic metrics for the last 10 months."
- Make sure all the tools mentioned are enabled before running queries.

- Note that in Claude Connectors Settings, if the connector is set to “Needs approval”, you will be prompted to grant permission before any query can return an answer. You can choose “Always allow” to grant the connector access automatically. This ensures smooth and uninterrupted use of the Pulsetic tools without repeated permission prompts.
- To edit the permissions, go to Customize, then select Connectors, and choose Pulsetic. Customize the permission settings accordingly.

Claude Code (Anthropic's CLI for developers)
Claude Code is a high-performance command-line interface that allows you to interact with your codebase and infrastructure directly from your terminal. It uses a built-in configuration vault to manage MCP servers like Pulsetic.
1. Setup the Project Configuration
Instead of global settings, we use a project-level file to define the connection.
- Action: In your project's root directory, create a file named
.mcp.json.

- Configuration: Populate the file with the following JSON structure:
{
  "mcpServers": {
    "pulsetic": {
      "type": "streamableHttp",
      "url": "https://api.pulsetic.com/mcp",
      "headers": {
        "Authorization": "Bearer YOUR_API_KEY"
      }
    }
  }
}
Note
Replace YOUR_API_KEY with your actual API key. Ensure the file is saved in the exact directory where you plan to run Claude.
2. Environment Verification
Before launching the agent, verify that your terminal environment is clean and running the correct version.
- Check Version: Run the following command to ensure you are on the native 2.1.85+ build:
claude --version
- Verify File Placement: Confirm the config file is visible to the system:
ls -a | grep .mcp.json

3. Initializing the Connection
To activate the Pulsetic tools, you must start a session from within the directory containing your .mcp.json .
- Launch Claude: Type
claudeand hit Enter. -
Grant Trust: Because a local configuration is detected, Claude will ask:
"Do you trust this project to run MCP tools? (y/n)"
- Type
yto authorize the connection.
4. Verification of Connectivity
Once inside the active Claude session, confirm the "handshake" with the Pulsetic server was successful.
- Status Command: Type
/mcp list - The Result: You should see pulsetic listed with a Connected status. This confirms that Claude has successfully parsed your
.mcp.jsonand reached the remote API.

5. Executing Prompts
With the connection confirmed, you can now issue natural language commands that utilize Pulsetic’s data.
- Example Prompt:
"Using Pulsetic, list all my active monitors and give me a summary of any downtime recorded in the last 24 hours."
- Permission Handling: The first time a tool is called, Claude will ask for permission. You can select "Yes, and don't ask again for pulsetic" to ensure future queries run without interruption.

Managing the Project Scope
- Updating Keys: If you need to rotate your API key, simply edit the
.mcp.jsonfile and restart your Claude session. - Global Conflicts: If Claude ignores your project file, it is likely because a global version exists. You can clear it by running
claude mcp remove pulsetic --scope userbefore starting your session.
ChatGPT (OpenAI's AI Assistant)
ChatGPT supports the Model Context Protocol (MCP) through Developer Mode. This integration allows ChatGPT to act as a remote client using OAuth 2.1 to securely communicate with Pulsetic's infrastructure.
Enable Developer Mode
-
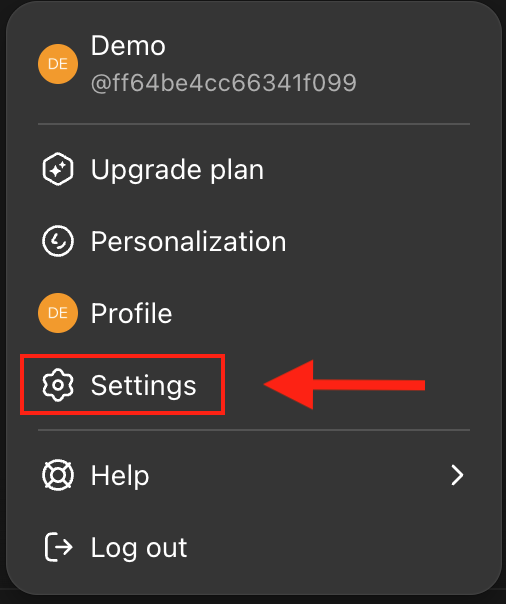
Go to your profile icon in the bottom-left corner and select Settings.
Settings - Navigate to Apps, then select Advanced settings.
- Toggle Developer mode to ON.


Note:
This feature is available for ChatGPT Pro, Plus, Team, Business, Enterprise, and Edu users.
Create the Pulsetic App
- In the Apps dialog, click the Create app button.
- Fill in the following fields:
| Field | Value |
| Name | Pulsetic MCP (or your preferred name) |
| Description | Real-time uptime monitoring and incident management |
| MCP Server URL | https://api.pulsetic.com/mcp |
| Authentication | OAuth |

Endpoint Verification
ChatGPT will attempt to "Auto-Discover" the security endpoints from the Pulsetic server. You can verify these under Advanced settings within the app creation screen:
- Auth URL:
https://api.pulsetic.com/mcp/oauth/authorize - Token URL:
https://api.pulsetic.com/mcp/oauth/token - Registration URL:
https://api.pulsetic.com/mcp/oauth/register
Finalize & Authenticate
- Check the box "I understand and want to continue" and click Create.
- You will be redirected to the secure Pulsetic authorization page.
- Enter your Pulsetic Account Email and your API Token. The email address provided must match the owner of the API token to prevent authentication failure.
Using Pulsetic in Chat
To use your monitors, you must explicitly enable the Pulsetic toolset for each new conversation.
- Start a New Chat.
- In the bottom-left corner of the message bar, click the + (plus) icon.
- Select More, then select Pulsetic MCP in the list.
-
Type a query to trigger the tools. For example:
"Using Pulsetic, list all the monitors in my system and show me the current uptime percentage for each."

Cursor (AI-Native Code Editor)
Cursor supports MCP servers to give its AI "Composer" and "Chat" features direct access to external tools. For Pulsetic, it uses the Streamable HTTP transport to maintain a persistent connection to the remote API.
Installation
- Open your Cursor settings by pressing
Cmd + ,on a Mac orCtrl + ,on Windows and Linux, or click the gear icon located in the top-right corner of your editor. -
In the settings sidebar, select the Tools & MCP section.
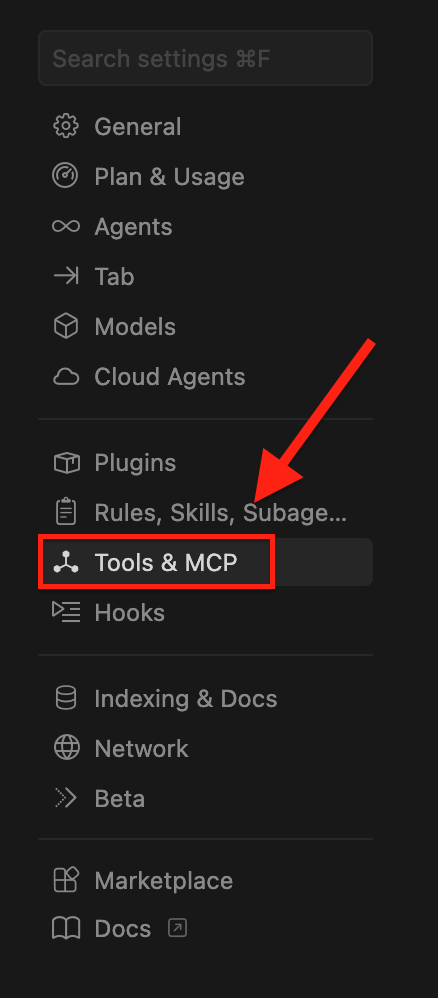
Select Tools & MCP - In the Installed MCP Servers section, click the Add Custom MCP button.


- Update your configuration in the following format:
{
  "mcpServers": {
    "pulsetic": {
      "type": "streamableHttp",
      "url": "https://api.pulsetic.com/mcp",
      "headers": {
        "Authorization": "Bearer YOUR_API_KEY"
      }
    }
  }
}
Verification
- Check the server entry in your Cursor settings after saving.
- Look for a green dot next to
pulseticto indicate a successful handshake. - Click on the server name to expand and verify the list of available tools, such as
list_monitorsorget_monitor_events.

Using Pulsetic with Cursor
- Open the AI pane. Ensure the mode is set to Agent so Cursor can actively execute the Pulsetic tools rather than just generating text.
- Enter a natural language request, such as:
"Using the Pulsetic MCP, fetch my monitor list and write a React component (using Tailwind and Recharts) that visualizes the last 10 months of traffic metrics."

Approval Prompts: By default, Cursor will ask for permission before running a "Write" tool (like creating a monitor). You can select "Always allow for this session" in the pop-up notification to streamline your workflow.
Windsurf (Codeium's Agentic IDE)
Windsurf supports MCP servers through its Cascade AI system. It uses a global configuration file to bridge the connection to Pulsetic.
Enable MCP in Windsurf
- Go to the Windsurf - Settings button in the top-right corner of the IDE.
- Navigate to the Cascade section in the settings menu.
- Under the MCP Servers section, click on the Open MCP Marketplace link.

Configure the Pulsetic Server
- In the MCP Marketplace, locate the Installed MCPs section, and click on the Settings (gear) icon.
- This action will redirect you to the
mcp_config.jsonfile. - Update your configuration with the following JSON:
{
  "mcpServers": {
    "pulsetic": {
      "command": "npx",
      "args": [
        "-y",
        "mcp-remote",
        "https://api.pulsetic.com/mcp",
        "--header",
        "Authorization: Bearer YOUR_API_KEY"
      ]
    }
  }
}
Note:
Replace YOUR_API_KEY with your actual API key. Save the file and restart Windsurf to apply the changes.
Verification and Use
-
Navigate back to your installed MCPs list in the marketplace to confirm that the
pulseticserver appears and is enabled.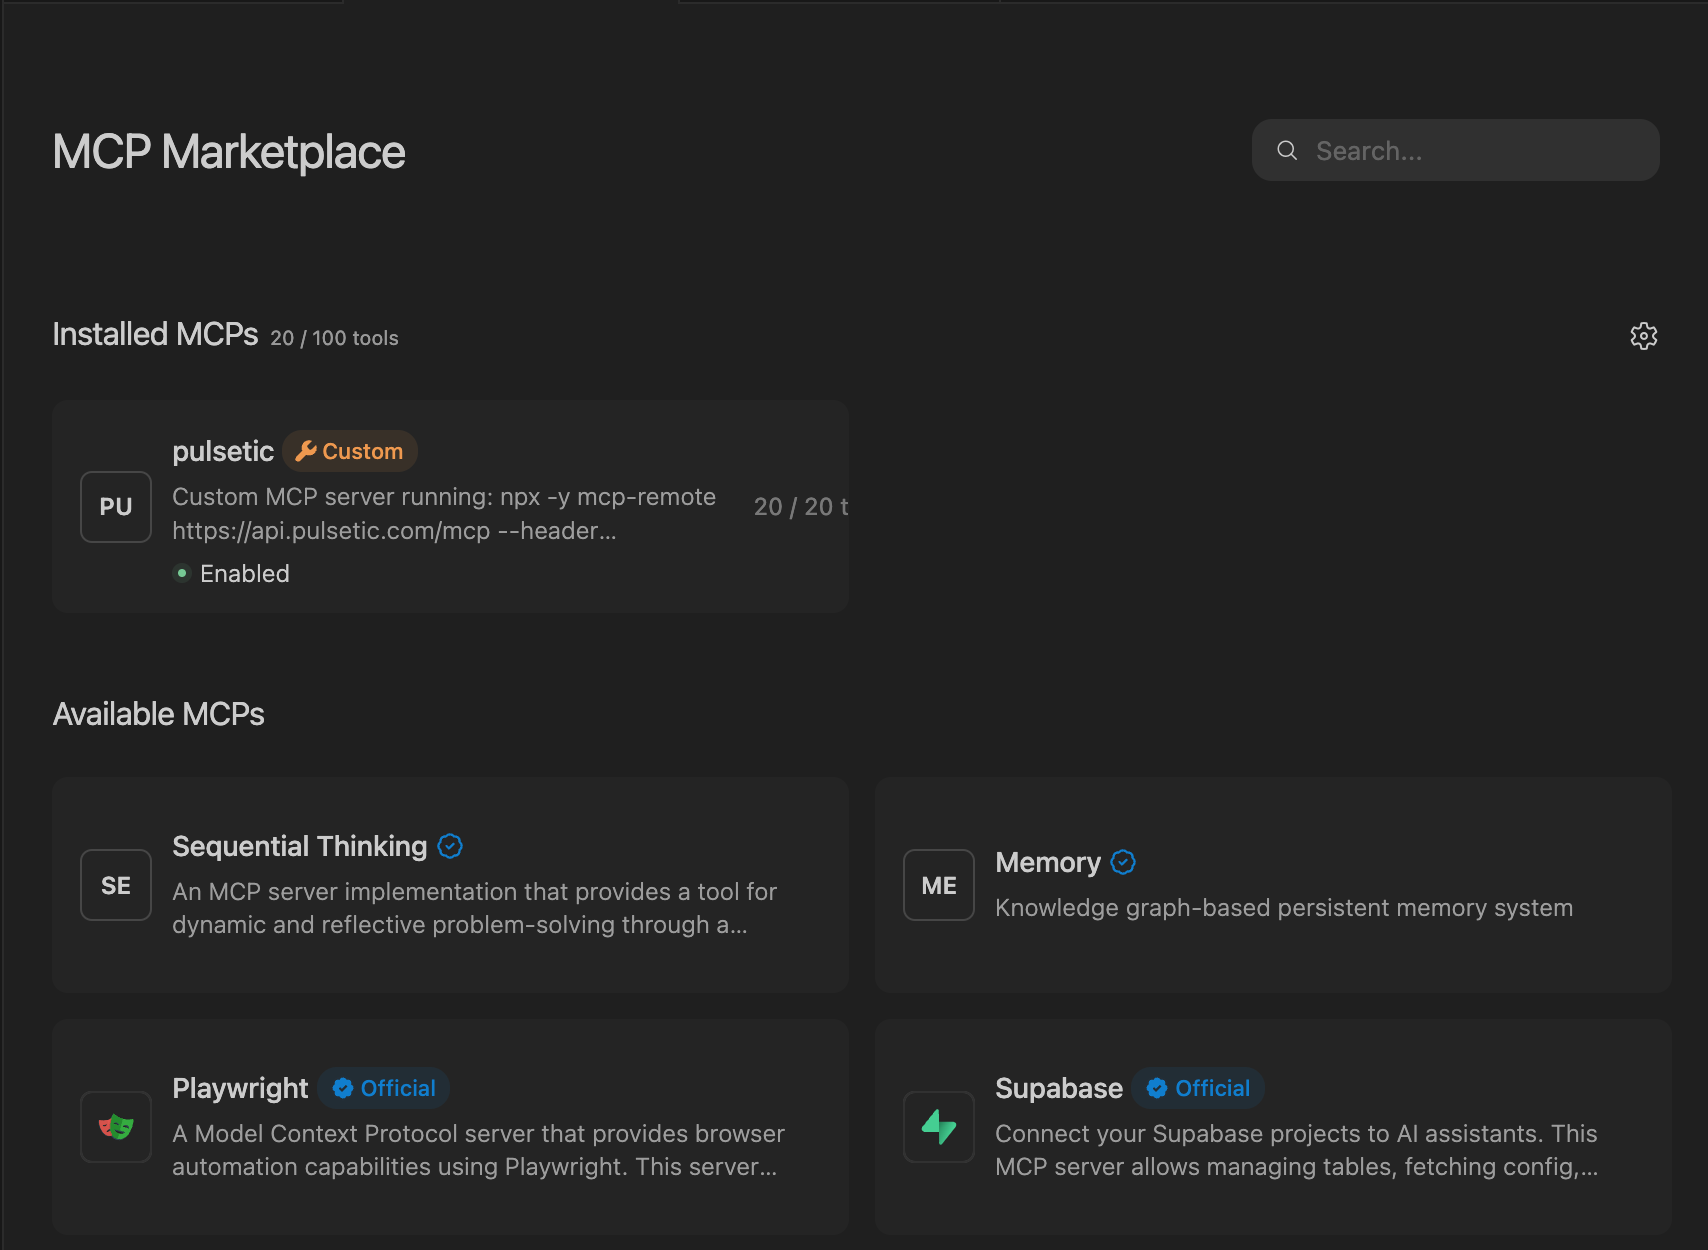
Enabled MCP Server -
Add a prompt in Cascade, for example:
"Using Pulsetic, list down all the monitors in my system, then create a dashboard based on the traffic metrics for the last 10 months."


Available Tools & Use Cases
Once connected, the MCP server exposes 17 tools across four categories. Here are real examples and prompting tips to help you get the most from your connection:
1. Monitors
(Tools: list_monitors , get_monitor , get_monitor_stats , get_monitor_events , get_monitor_downtime , create_monitor , update_monitor , delete_monitor , pause_monitor , resume_monitor )
- "Show me all my monitors and their current status."
- "What's the uptime for my production API monitor over the last 30 days?"
- "Create a new monitor for https://api.example.com that checks every 30 seconds."
- "Pause the staging monitor while we do the migration."
2. Status Pages
(Tools: list_status_pages )
- "List all my status pages and their domains."
3. Incidents
(Tools: list_incidents , create_incident , update_incident , resolve_incident )
- "Create an incident on our main status page: 'Elevated API latency' with status investigating and message 'We're looking into slow response times.'"
- "Resolve incident 8 with message 'Connection pool limits increased. Response times back to normal.'"
4. Maintenance
(Tools: create_maintenance , delete_maintenance )
- "Schedule a maintenance window on status page 1 called 'Database upgrade' starting 2025-03-20 at 2am UTC and ending at 4am UTC."
Troubleshooting & Testing
If you run into issues with your AI client not recognizing commands or returning errors, you can test the MCP endpoint directly with cURL to verify your API key works.
Initialize
curl -X POST https://api.pulsetic.com/mcp \
  -H "Authorization: YOUR_API_KEY" \
  -H "Content-Type: application/json" \
  -d '{
    "jsonrpc": "2.0",
    "id": 1,
    "method": "initialize",
    "params": {
      "protocolVersion": "2025-03-26",
      "capabilities": {},
      "clientInfo": {"name": "curl", "version": "1.0"}
    }
  }'
List tools
curl -X POST https://api.pulsetic.com/mcp \
  -H "Authorization: YOUR_API_KEY" \
  -H "Content-Type: application/json" \
  -d '{"jsonrpc":"2.0","id":2,"method":"tools/list"}'
Call a tool
curl -X POST https://api.pulsetic.com/mcp \
  -H "Authorization: YOUR_API_KEY" \
  -H "Content-Type: application/json" \
  -d '{
    "jsonrpc": "2.0",
    "id": 3,
    "method": "tools/call",
    "params": {
      "name": "list_monitors",
      "arguments": {}
    }
  }'
Common Errors:
- 401 Unauthorized: Verify your API key is correct, hasn't expired, and is passed in the
Authorizationheader. Confirm your account is on a Business or Enterprise plan. - OAuth authorization fails: Ensure the email entered matches the API token owner, and Developer Mode is enabled in ChatGPT.
- Monitor not found or access denied: Use
list_monitorsto confirm your available monitor IDs. - Protocol errors: Ensure requests use
Content-Type: application/jsonand thejsonrpcfield is exactly"2.0".
API Reference & Official Documentation
For a complete technical breakdown, detailed tool schemas, and further examples, please refer to the official Pulsetic MCP Server Documentation.