
Integrating Cloudflare with Pulsetic
If you use Cloudflare to secure your infrastructure, you can integrate it directly with Pulsetic. By connecting Cloudflare once at the account level, Pulsetic will automatically add and maintain the necessary IPv4 and IPv6 allow rules to ensure your monitors function smoothly without being blocked by your firewall.
For your security, your Cloudflare API token is always stored encrypted.
How to Connect Cloudflare with Pulsetic
Step 1: Generate Your Cloudflare API Token
Before connecting the two services, you must generate a dedicated API token in Cloudflare with specific permissions.
- Access your Cloudflare dashboard.
-
Go to My Profile > API Tokens.
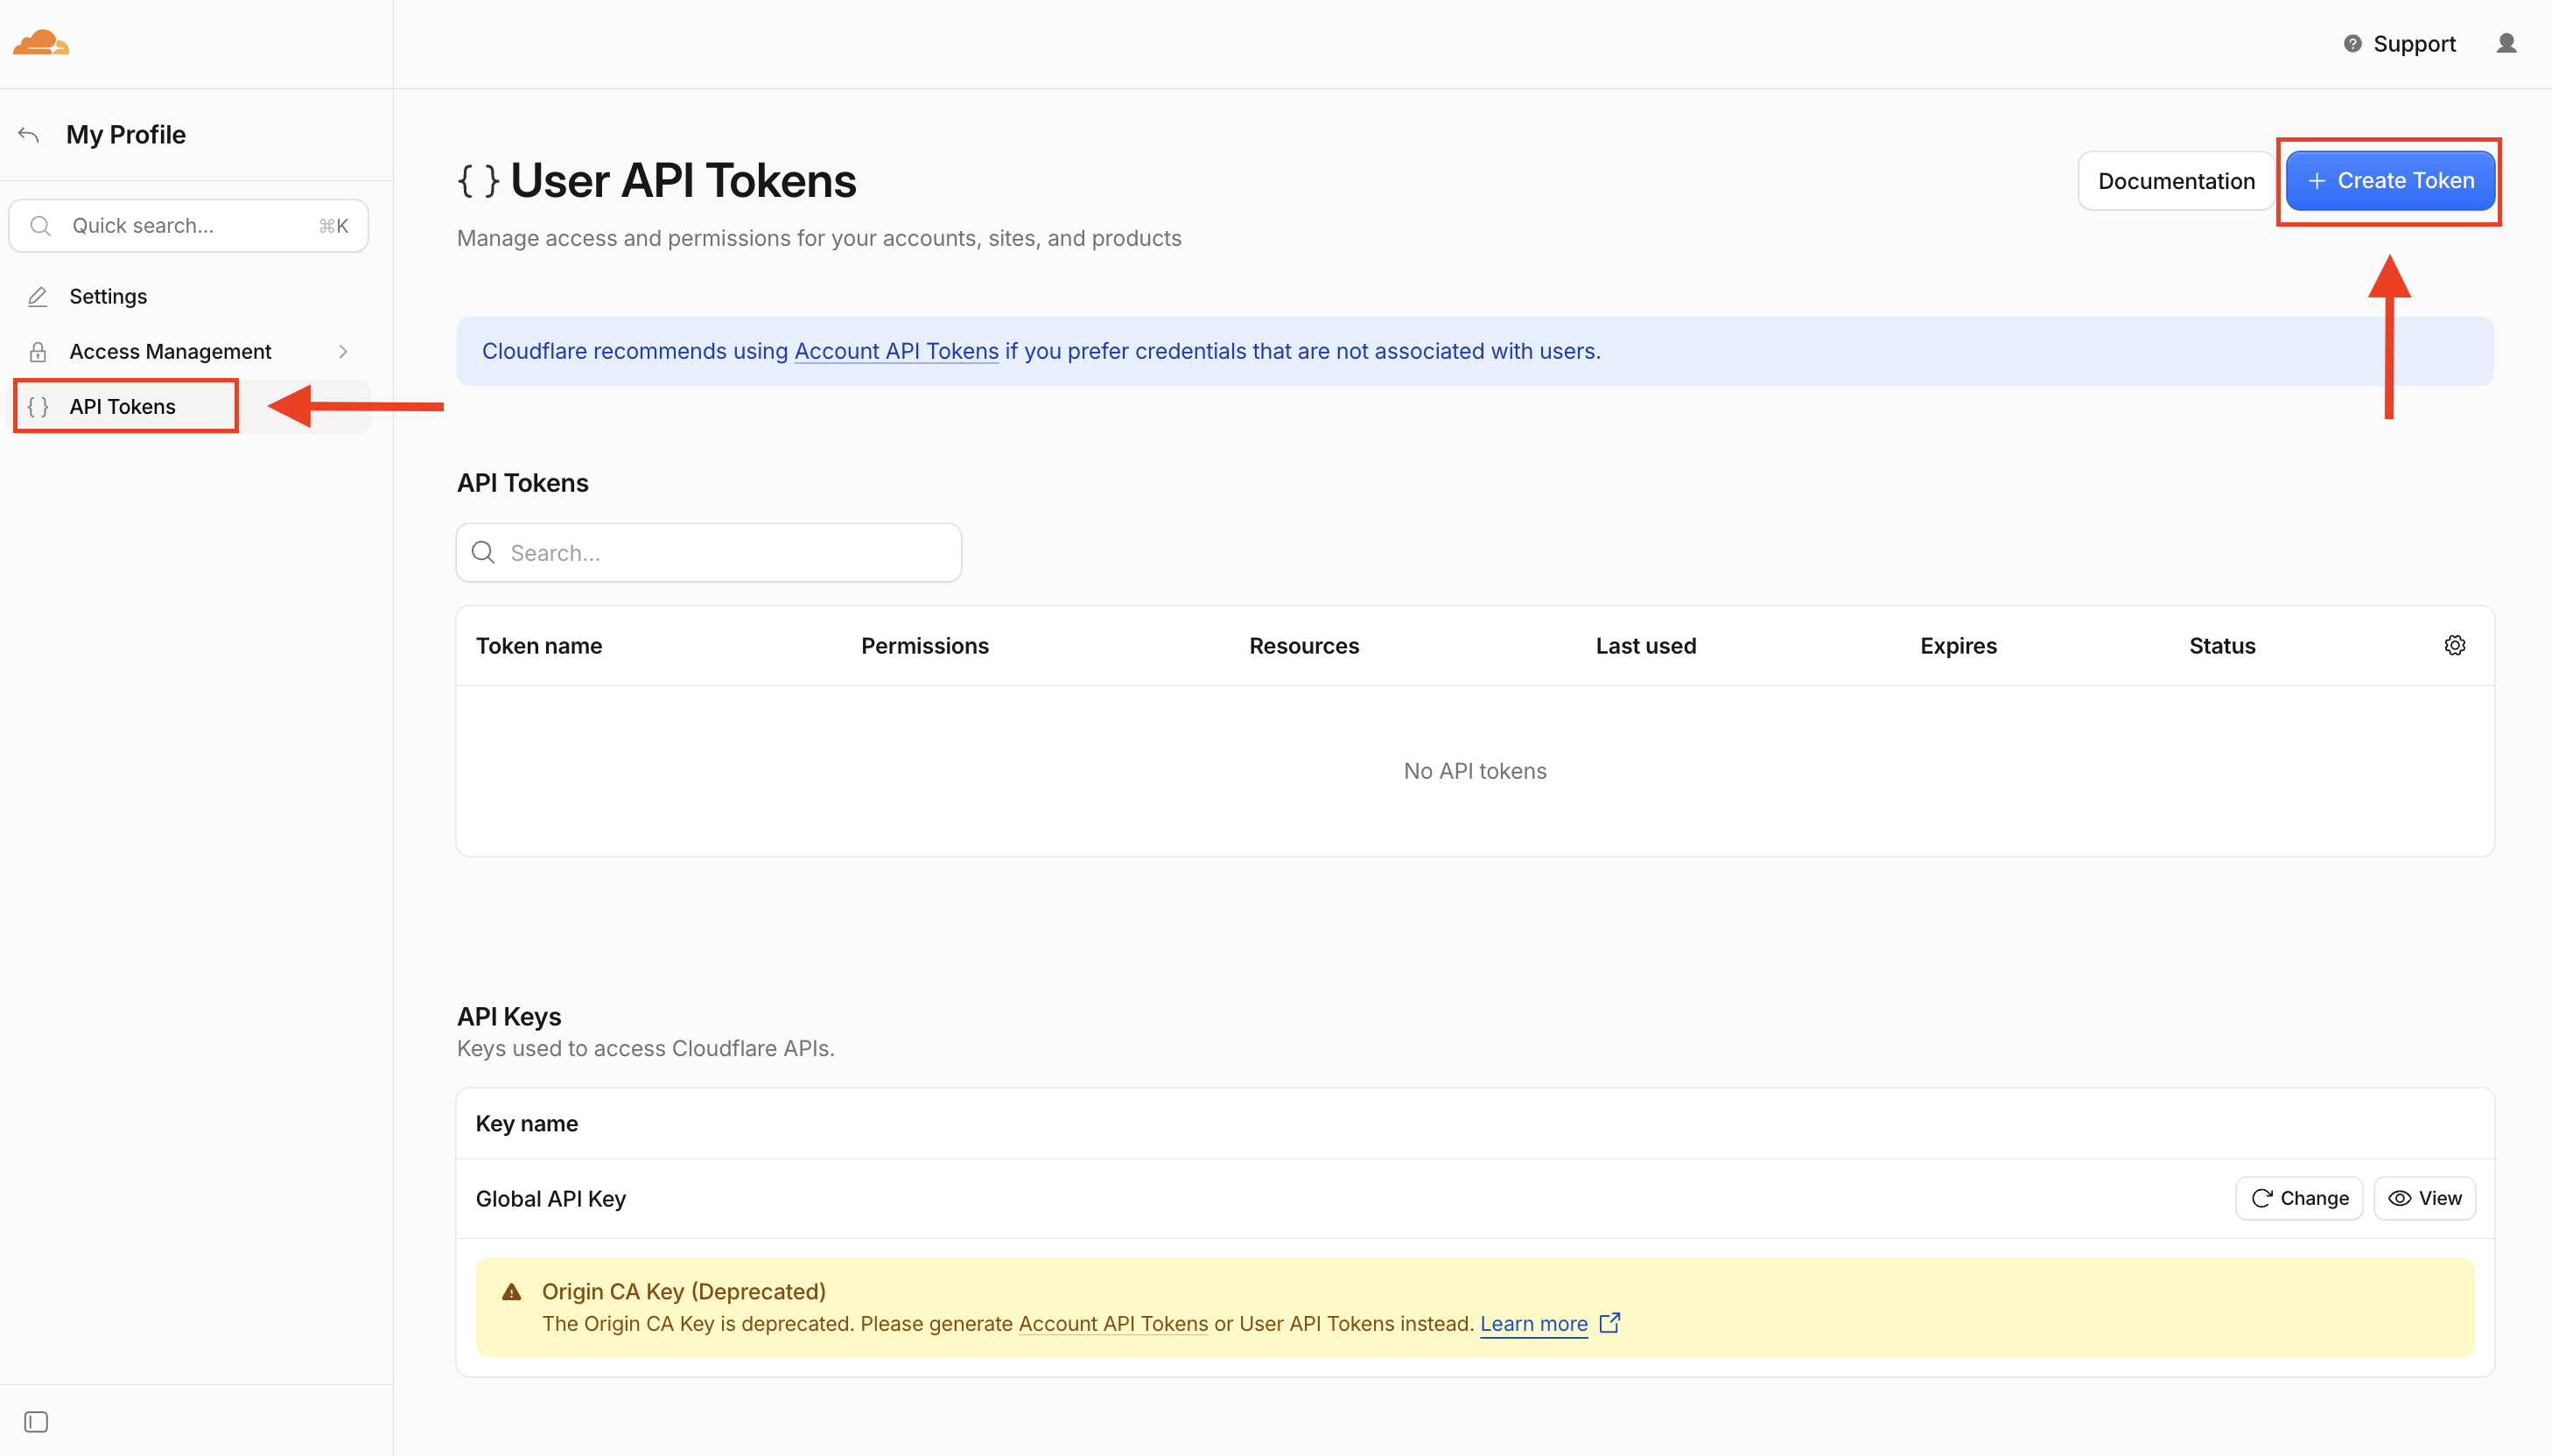
- Click the Create Token button.
-
Choose the option to create a Custom Token.
Set Permissions: You must grant the token the following specific access levels so Pulsetic can manage the IP allowlist:
- Account | Account Settings | Read
- Account | Firewall Access Rules | Read/Write (or Edit)
- Complete the setup and copy your new API token.
Note:
For a more comprehensive walkthrough on token generation, including managing IP filtering and TTL (Time to Live), refer to the official Cloudflare API Token Documentation.
Step 2: Connect Cloudflare with Pulsetic
Once you have your appropriately scoped API token, follow these steps to connect your account:
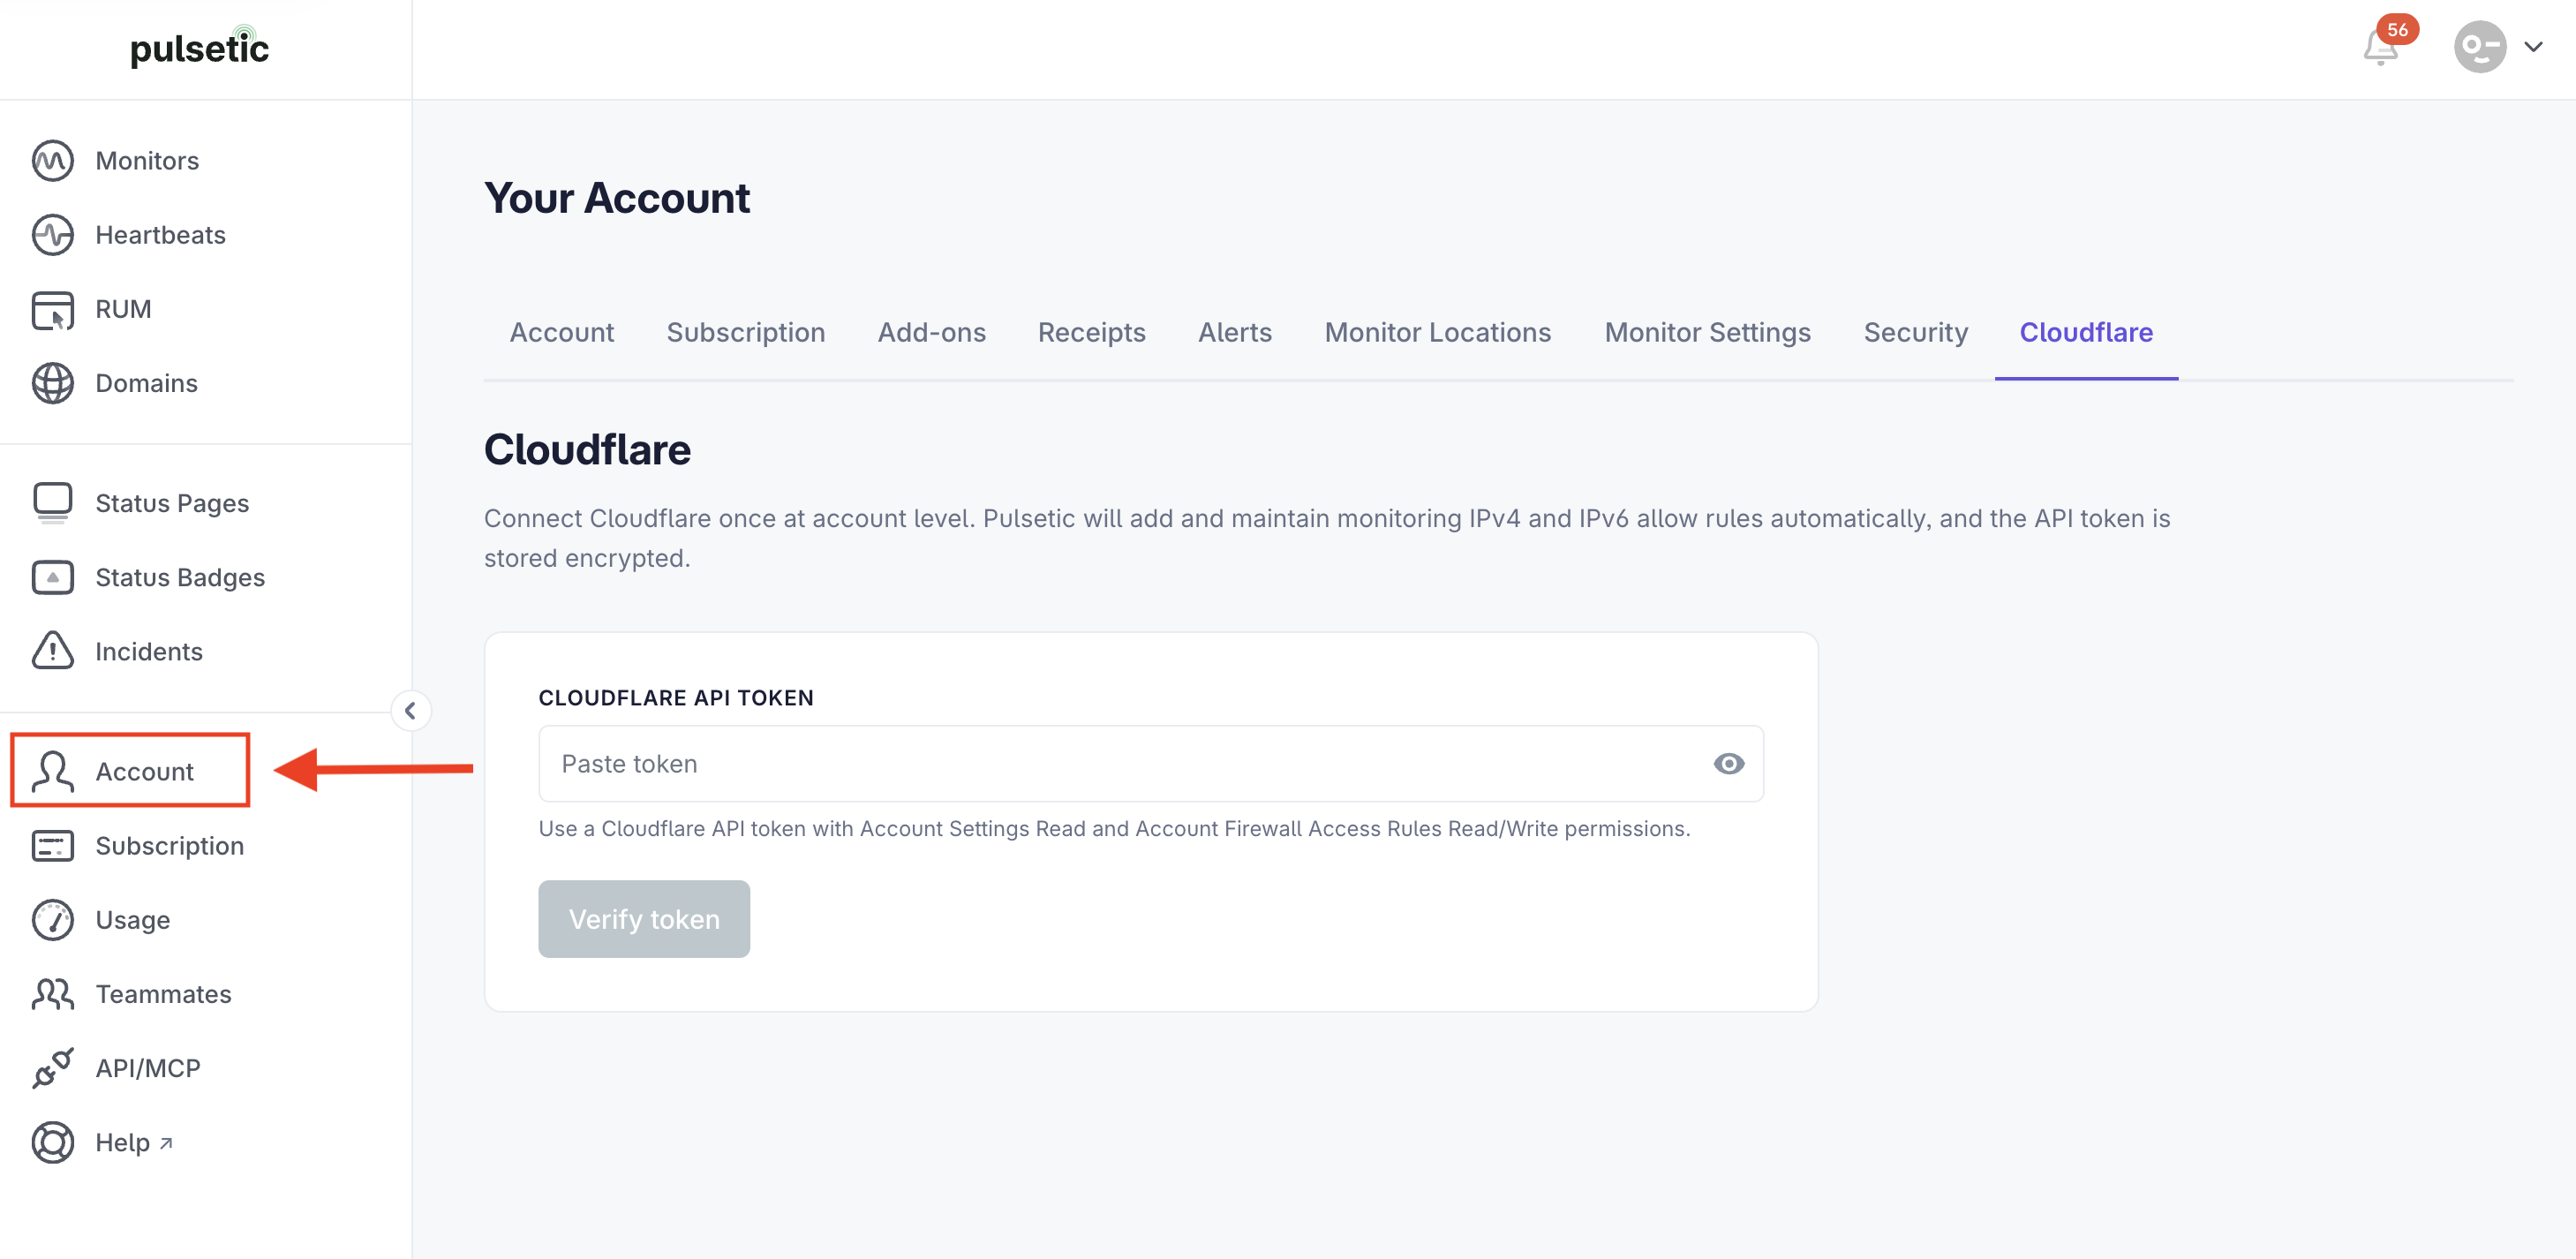
- Log in to your Pulsetic account and open your main account settings.
- Look for the Cloudflare tab.
- In the provided Cloudflare API token field, paste the token you generated in step 1.
- Click the Verify token button.
Once verified, Pulsetic will handle the rest, automatically maintaining your allow rules so your monitoring remains uninterrupted.