Setting Up Custom Email Sender for Status Page
By default, Pulsetic sends status updates to your subscribers using a generic system address. The Custom Email feature allows you to "white-label" these notifications, sending them directly from your company's domain (e.g., status@yourcompany.com ).
This integration is critical for two reasons:
- Trust & Branding: Users are more likely to open and trust emails that come from a domain they recognize.
- Deliverability: Sending via your own authenticated provider (with proper SPF/DKIM records) prevents your important outage alerts from landing in the Spam folder.
Prerequisites
Before you begin, ensure you have:
- Active Paid Subscription: Custom Email is a premium feature. You must be on a paid Pulsetic plan to access these settings.
- External Email Provider: You need an active account with a third-party email service (such as SendGrid, AWS SES, Mailgun, or a standard SMTP server).
- Verified Sending Domain: To ensure emails are actually delivered, you must have already verified your domain (configured DKIM/SPF records) within your email provider's dashboard.
- Active Audience: This feature works in tandem with your subscriber list. If you haven't set that up yet, please refer to our guide on How to Add Subscribers to Your Status Page.

Step 1: Activate the Integration
- Log in to your Pulsetic Dashboard.
- Navigate to Status Pages and select the page you wish to configure.
- Click the Custom Email tab located in the top navigation menu (right next to Subscribers).
- Toggle the switch to Enable Custom Email Integration.

Step 2: Configure Sender Identity
This section determines how the email looks in your subscriber's inbox.
- Send From Address: Enter the email address that notifications will appear to come from (e.g.,
status@acme.com).-
Tip: Use a recognizable address. Avoid personal emails like
john@acme.com.Send From Name: Enter the name displayed to recipients (e.g.,
Acme System Status).Reply to Address: Enter the email address where user replies should be delivered (e.g.,
support@acme.com). - Best Practice: Avoid using "no-reply" addresses. If a user replies to an outage alert, it's usually because they are experiencing issues and need help.
-
- Reply to Name: The name associated with the reply-to address (e.g.,
Acme Support Team).

- Custom Headers (Optional)
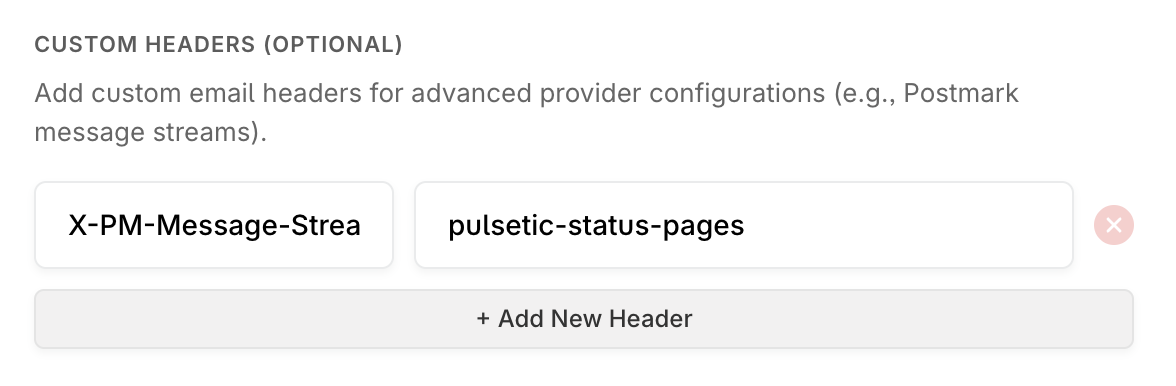
By selecting this option, you can add custom email headers for advanced provider configurations (e.g., Postmark message streams).
Step 3: Select Your Provider
Pulsetic supports both standard SMTP and direct API integrations. Choose your provider from the dropdown menu and fill in the specific credentials required.
Option A: SMTP (Universal)
Use this option for providers like Outlook 365, Zoho, Gmail (Google Workspace), or private corporate mail servers.
-
Host: The server address (e.g.,
smtp.office365.comorsmtp.gmail.com).Port: The communication port.
- 587: Standard for TLS encryption (Recommended).
- 465: Standard for SSL encryption.
- 25: Usually blocked by cloud providers; avoid using.
-
Encryption: Select SSL or TLS based on your port selection.
Username: Your full email address.
Password: Your email password.
- Note: If you use Two-Factor Authentication (2FA), you likely need to generate an App Password in your email provider's security settings. Do not use your regular login password. For example, if you are using Google, here is how you can create the App Password.

Option B: API Providers (Recommended for High Volume)
API integrations are generally faster and more reliable than SMTP.
1. Mailgun
- API Key (Secret): Found in your Mailgun Settings > API Keys.
- Domain: The domain name you verified in Mailgun (e.g.,
mg.acme.com). - Endpoint: Select the region your domain was created in (US or EU).

2. SendGrid
- API Key: Generate a new API Key in SendGrid with "Mail Send" permissions.

3. Postmark
- Server Token: Found in your Postmark Server > "API Tokens" tab.
- Note: This is different from your Account API Token.

4. AWS SES (Amazon Simple Email Service)
- Access Key ID & Secret Access Key: Generate these in the AWS IAM console for a user with
ses:SendEmailpermissions. - Region: The AWS region where you verified your domain identity (e.g.,
us-east-1,eu-west-1).

5. Lettermint
- Host: The Lettermint SMTP host provided in your dashboard.
- Port: The specific port assigned to your account.
- Encryption: Select the encryption method specified by Lettermint.
- Username & Password: Your specific Lettermint SMTP credentials.

5. Resend
- API Key: Create a new API Key in the Resend dashboard.

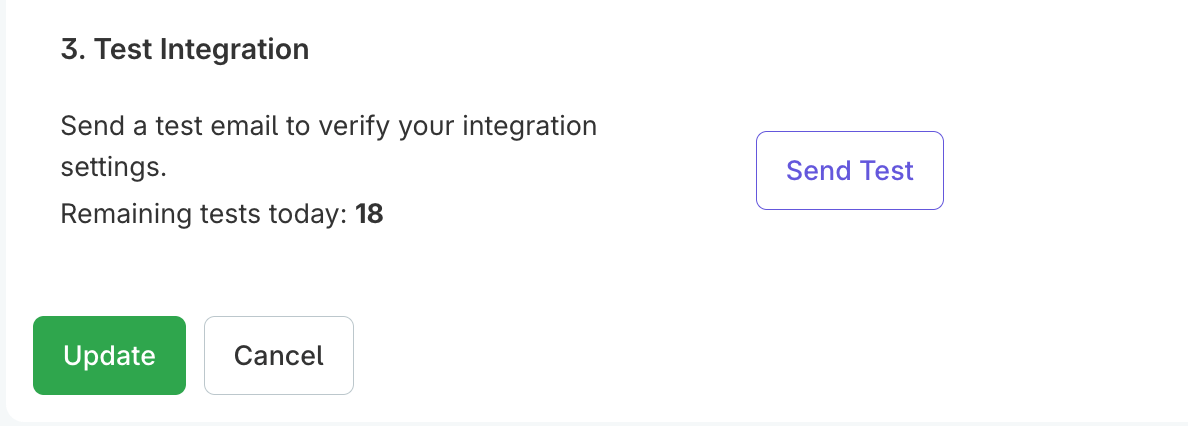
Step 4: Save & Test Integration
Once you have entered your credentials, a new section labeled Test Integration will appear at the bottom of the page. This allows you to verify the connection immediately without needing to add a fake subscriber.
- Click on the Update button to ensure your settings are saved first.
- Locate the Test Integration section.
- Click the Send Test button to send a verification email.
- Recipient: The system will automatically send the test email to the email address associated with your Pulsetic account.
-
Note: There is a limit of up to 20 test emails. Use them wisely when troubleshooting.
Test Integration
- Check your inbox. If you receive the sample email from your custom domain, the setup is successful.


Once the integration is successful, your subscribers will receive an email that looks like this:
